
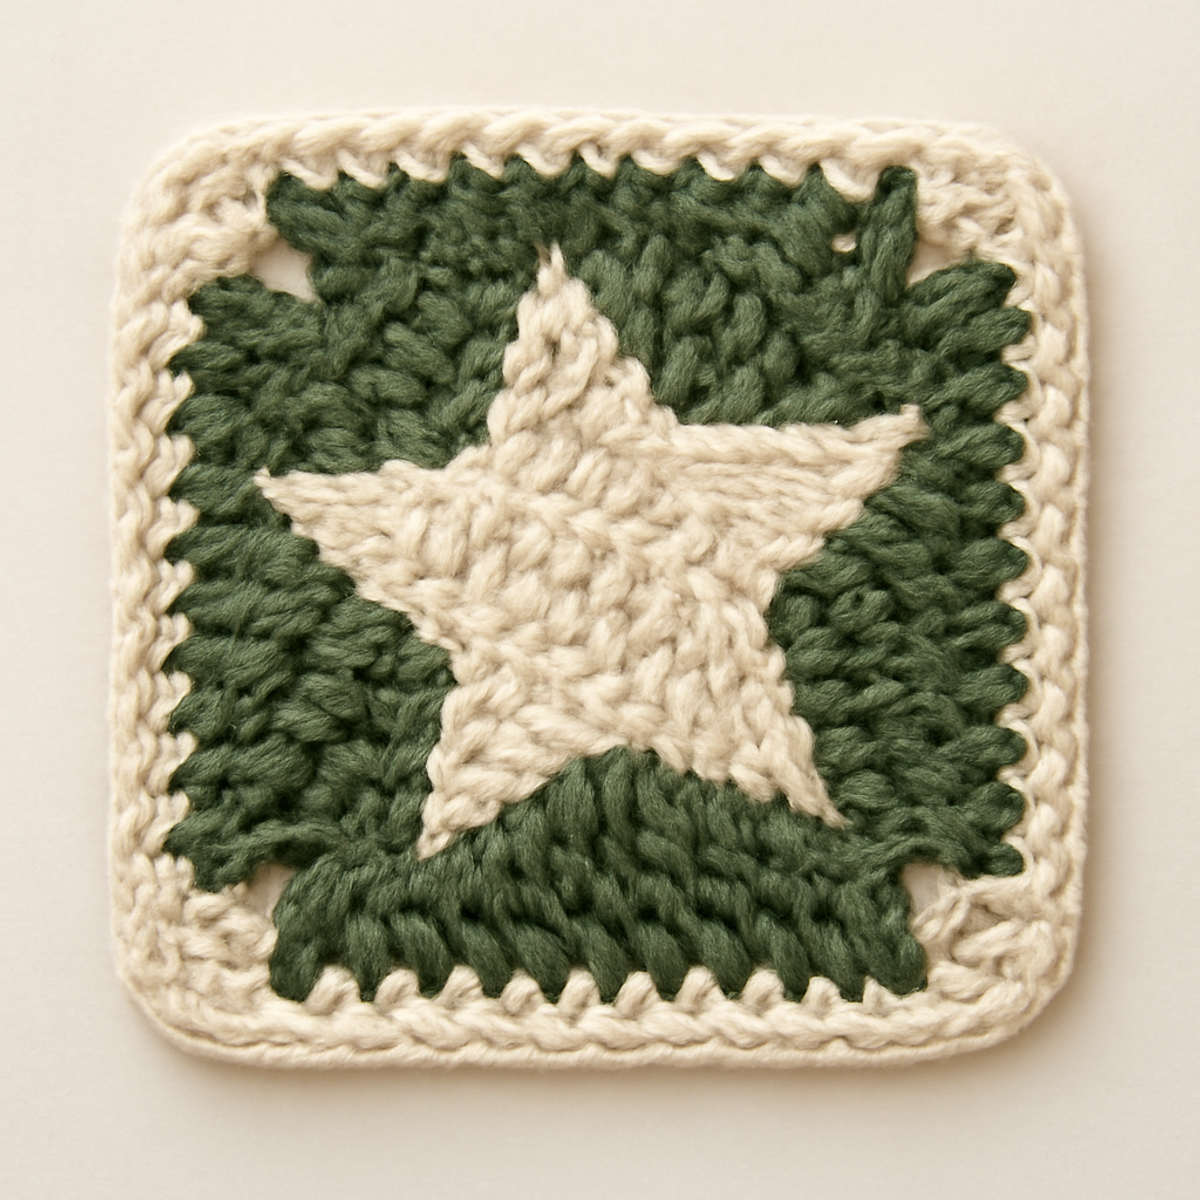
After a long day, finding that perfect, soothing crochet project can feel like discovering a hidden gem. Enter the star granny square—a delightful design that transcends time and appeals to both beginners and seasoned crafters alike. This versatile pattern offers a magical way to showcase your creativity, whether you’re crafting cozy blankets, charming decorative pillows, or unique wall art. Not only does the star granny square work up quickly, but it also allows for endless color combinations, making it a fantastic option for personal expression. As you immerse yourself in the gentle rhythm of stitches, you’ll find this engaging pattern to be both relaxing and rewarding. Ready to dive in and make your very own star granny square? Let's stitch our way to cozy bliss!
Star Granny Square Materials & Tools
For crafting your lovely star granny square, here's what you'll need:
Yarn
- Medium (Worsted) Weight Yarn – Use a cotton blend for softness and durability; estimate 100-150 yards in dark green, light green, and beige.
Tools & Notions
- 5.0 mm (H-8) Crochet Hook – This size is perfect for achieving the right drape and stitch definition for your star granny square.
- Stitch Markers – Helpful for tracking your rounds and maintaining consistency throughout your project.
Enjoy the rhythm of the stitches as you create your beautiful star granny square!
Why Choose the Star Granny Square?
Endless versatility: This star granny square works wonders for a variety of projects, from cozy blankets to eye-catching wall art, making it perfect for all occasions.
Beginner-friendly: With its focus on basic stitches and repetitive patterns, even novices will find joy in creating this stunning piece.
Creative canvas: The potential for color experimentation allows crafters to express their unique styles, ensuring no two squares are ever alike.
Soft & sturdy: The textured finish combines comfort with durability, creating a striking visual appeal that enhances your home decor.
Quick satisfaction: Finish a square in no time, perfect for those moments when you need a quick and gratifying crochet fix!
Gauge & Sizing Notes
Don't skip the gauge swatch! Checking your tension is crucial for ensuring that your star granny square turns out the right size and maintains its beautiful shape. For best results, aim for a standard crochet gauge of 4×4 inches (10×10 cm) to equal about 12 double crochets by 10 rows, though this may vary depending on your yarn and hook choice. If you'd like to create a larger square, simply increase your starting chain in multiples of 6 plus 2, adjusting each round accordingly. If your swatch is smaller than expected, consider going up a hook size to achieve the perfect fit for your star granny square. Happy stitching!
Step-by-Step Pattern for Star Granny Square
Row 1: Magic Circle and First Points
Begin by creating a magic circle. Ch 3 (counts as your first dc), then work 4 more dc into the circle. This forms the first point of your star. Now, ch 2, and make 5 dc into the magic circle again. Repeat the ch 2 and 5 dc sequence a total of 4 more times to create 5 points. Pull the magic circle tight to close (25 sts).
Row 2: Connecting Points
Now that the first round is complete, join with a sl st to the top of the initial ch-3. Ch 3 (counts as your first dc), then make 2 dc into the ch-2 space of the previous round. Next, ch 2, and work 3 dc into the same ch-2 space. Repeat this pattern: 3 dc-ch 2-3 dc into each ch-2 space around. End this round by joining with a sl st to the top of the initial ch-3 (45 sts).
Row 3: Star Points
To create the star effect, slip stitch to the next ch-2 space. Ch 3 (counts as your first dc) and make 2 dc in the same space. Now, ch 2 and slip stitch into the next ch-2 space to create a point. For each remaining ch-2 space, repeat: 3 dc, ch 2, sl st into the next ch-2 space. Finish the round by sl stitching to the top of the initial ch-3 (60 sts). Your square should start forming a 3D look.
Row 4: Color Change and Border
Switch to your dark green yarn. Slip stitch in the next stitch, then ch 3. Work a dc in the same stitch. In each ch-2 space, make 2 dc, ch 2, and 2 dc. This creates a lovely textured border. Remember that your st count will grow; keep joining with a sl st to the top of your ch-3 as you complete this round (80 sts).
Row 5: Finalizing the Square
Continue with the dark green; into the corners, complete 2 dc, ch 2, 2 dc. For the sides, work 2 dc in each space between the corner clusters. This creates a bold perimeter for your star granny square. At the end of this round, join with a sl st to the top of your original ch-3 and your square should lay flat (95 sts).
Row 6: Neat Edging
Switch to beige for a polished look. Ch 1, then sc in each stitch around, placing 3 sc in each ch-2 corner space. This rounds out your star granny square beautifully. Make sure to join with a sl st at the end of the round to secure your work, keeping it clean and neatly finished (110 sts).
Row 7: Final Touches
To finish, secure your yarn by trimming and weaving in the ends. Consider blocking your star granny square to ensure it maintains its shape. If you used a cotton blend, this will help flatten and define the texture better. Your finished square should now measure approximately 12 inches, ready for use in blankets, pillows, or décor!
Expert Tips for Star Granny Square
-
Tension Matters: Maintain consistent tension while crocheting to prevent uneven edges. This ensures your star granny square has a polished finish.
-
Stitch Markers: Use stitch markers at the start of each round. They’ll help you keep track of your progress and avoid losing count.
-
Mind Your Yarn: Be careful of yarn splitting, especially with textured fibers. This can affect the neatness of your stitches, so always make sure to work through both strands.
-
Blocking Benefits: Don’t forget to block your finished square for a uniform shape. It can significantly enhance the visual appeal, especially if using natural fibers.
-
Finishing Touches: When weaving in ends, be discreet to keep your square looking clean and professional. A neat finish adds charm to your star granny square!
How to Wash and Care for Your Star Granny Square
Machine Washing: Use cold water on a gentle cycle to prevent any felting or pilling of your star granny square. This will help maintain its beautiful texture.
Hand Washing: For the best results, gently hand wash in cold water using a mild detergent. Avoid aggressive agitation to ensure the square retains its shape and integrity.
Drying/Blocking: Lay your star granny square flat to dry, reshaping it as necessary. Blocking can help define the stitches and ensure your piece looks its best after washing.
Storage: Store your square in a cool, dry place away from direct sunlight. This protects the vibrant colors and helps maintain the texture of your star granny square for future use.
Star Granny Square Variations
Feel free to add your personal touch to the star granny square and explore creative possibilities!
-
Color Palette: Experiment with soft pastels for a fresh feel or bold jewel tones for a rich, cozy vibe. Each choice breathes life into your square!
-
Yarn Weight Swap: Try using bulky yarn for a thicker, cozier square, perfect for warmth in winter. You'll enjoy the fast-paced stitching with this plush alternative.
-
Mixing Size: Combine different square sizes, like mini or jumbo, for a unique quilt. This playful mix invites visual interest while showcasing your creativity.
-
Textured Borders: Add a contrasting slip stitch border for a striking frame around your square. This small detail elevates the overall look beautifully!
-
Pom-Pom Accents: Attach a pom-pom or two at the corners for a touch of whimsy. This delightful addition can elevate the charm of your finished piece.
-
Fringe Love: Consider adding fringe along the edges for a boho vibe. This whimsical texture invites even more creativity to your crafting journey.
-
Seasonal Themes: Create themed squares for holidays by using seasonal colors and patterns. Your star granny square can become a festive centerpiece!
-
Creative Stitching: Incorporate different crochet stitches, like shells or popcorn, for unique textures. Each new stitch transforms the square into a captivating piece of art.
What to Pair with Star Granny Square?
Imagine the warmth and joy of curling up with a beautifully crafted set of cozy pieces that enhance your favorite crochet project.
-
Charming Pillow Covers: Create matching pillow covers using the star granny square design for a coordinated look in your living space.
-
Lush Blanket: Craft a cozy blanket by joining several star granny squares, offering a rustic yet modern aesthetic to your home. This project allows you to play with different colors, making it uniquely yours.
-
Colorful Wall Art: Turn your star granny squares into striking wall art by framing them; they serve as delightful focal points in any room.
-
Matching Coasters: Use leftover yarn to create charming coasters that tie your coffee table ensemble together while showcasing the same color palette.
-
Warm Beanie: Design a delightful beanie that mirrors the pattern; an excellent way to keep warm during chilly evenings while showcasing your flair!
Star Granny Square FAQs
Can I substitute yarn types for the star granny square?
Absolutely! While a medium (worsted) weight cotton blend is recommended for its softness and durability, you can certainly switch out for an acrylic yarn or a wool blend. Just keep in mind that different fibers may affect the drape and texture of your finished square, so it's a good idea to check your gauge before you start.
How do I resize my star granny square?
Don't panic! To make your square larger, simply add more rounds to your pattern. For a smaller square, you can skip rounds or adjust the starting magic circle to create a tighter base. Just remember to adjust your yarn amount accordingly!
Why is my star granny square curling?
This is quite common, especially if your tension is inconsistent. To cure this issue, ensure you're maintaining even tension throughout your project, and consider blocking your finished piece—this helps to flatten and shape it beautifully. It can make a world of difference!
What size crochet hook should I use for the star granny square?
I recommend a 5.0 mm (H-8) crochet hook for creating your star granny square. This size helps you achieve the right balance between drape and stitch definition, ensuring your square turns out looking its best.
How do I fix dropped stitches in my star granny square?
It's an easy fix! Just pick up the dropped stitch with your hook, and pull the working yarn through it to re-create the stitch. If you're having trouble, consider pulling your work back to the last completed round and re-crocheting it to ensure consistency.
What should I do if my yarn is splitting while I crochet?
Be mindful of yarn splitting, especially with textured fibers. If this happens, ensure you're inserting your hook cleanly through both strands of yarn. Switching to a smoother yarn may also help alleviate the issue.

Leave a Reply