
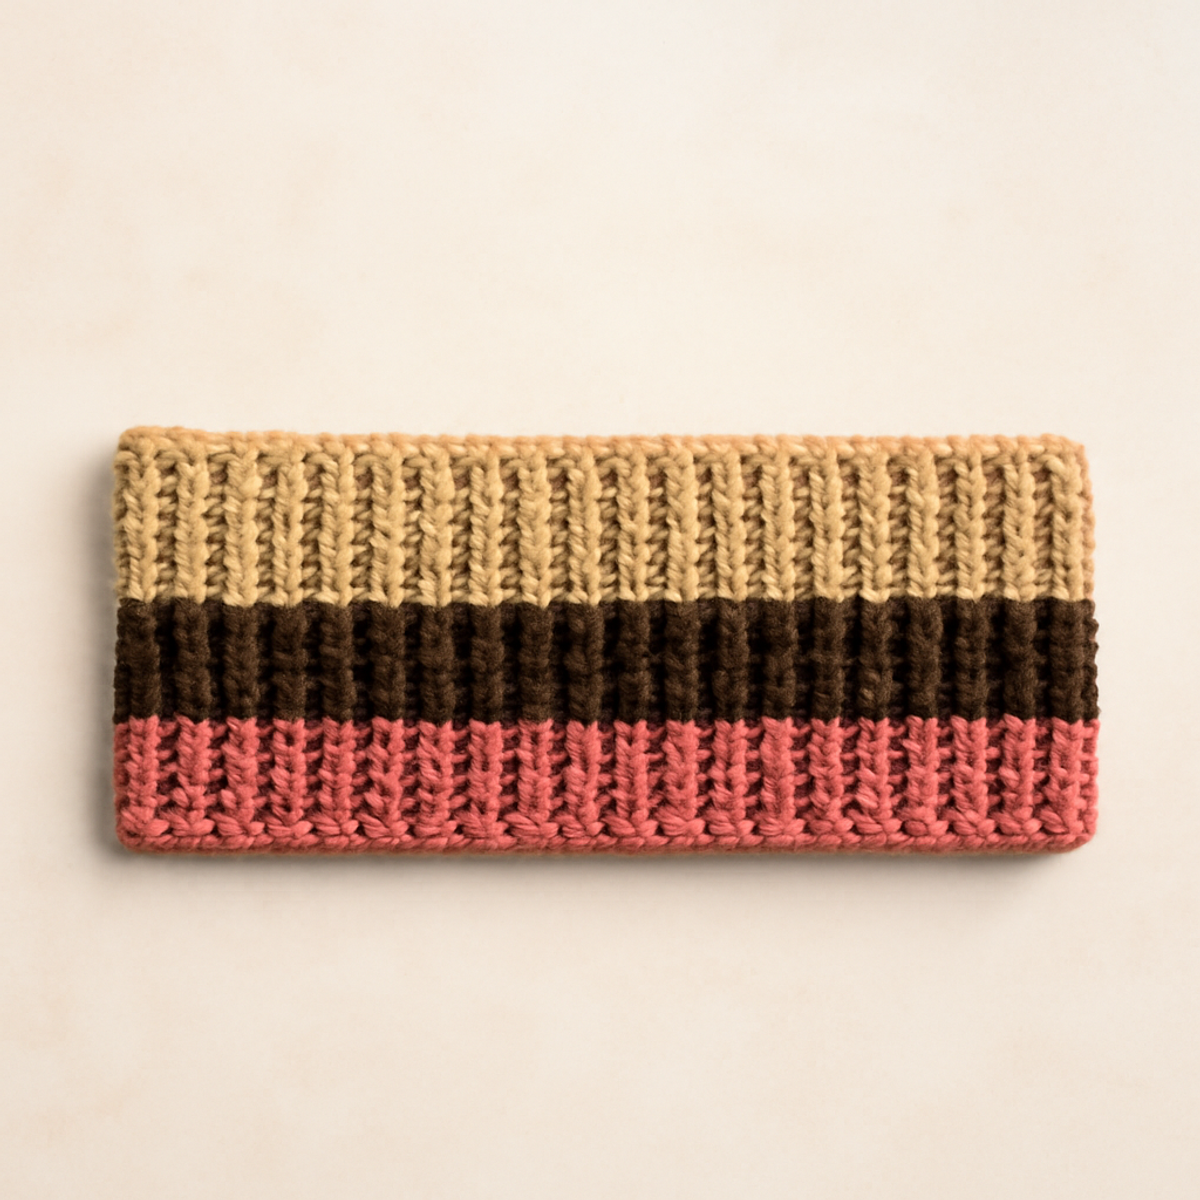
There's something truly delightful about wrapping a cozy crocheted headband around your head, instantly transforming both your look and your day. This "Quick & Easy Everyday Crochet Headband" is the perfect blend of fashion and function, making it an ideal choice for anyone looking to dive into the world of crochet. Designed for beginners, this pattern is accessible and works up in no time, allowing you to pull together a chic accessory for yourself or a thoughtful gift for someone special. With its versatile style, this crochet headband can be customized to reflect your personal flair, whether you opt for vibrant colors or soft pastels. Plus, the quick construction means you’ll be able to enjoy wearing it (or gifting it) faster than you can say “hook and yarn.” So, let’s get started on this delightful project that’s sure to warm hearts and heads alike!
Crochet Headband Materials & Tools
- Medium Weight Yarn – Approximately 100-150 yards are recommended; a blend of acrylic and wool offers both comfort and durability.
- 5.0 mm (H-8) Hook – This size is perfect for working the half double crochet stitch to achieve a cozy texture.
- Yarn Needle – Great for weaving in ends once your charming crochet headband is complete, ensuring a tidy finish.
Why Choose This Crochet Headband?
Versatile Fashion Statement: This headband is not just functional; it's the perfect accessory to elevate any outfit for all ages.
Beginner-Friendly Design: Made for those just starting out, you’ll find this pattern easy to follow and rewarding.
Quick Gift Option: With simple construction, you’ll whip up cozy headbands in no time—ideal for spontaneous gifting!
Customizable Style: Make it truly yours by experimenting with vibrant colors or textures, ensuring it matches any vibe.
Comfort & Warmth: The dense half double crochet stitches create not only a stylish accessory but also a cozy fit around your head.
Gauge & Sizing Notes
Don't skip the gauge swatch! Checking your tension is essential for the perfect fit of your crochet headband. A typical gauge measurement for a cozy crochet headband is about 4×4 inches (10×10 cm) square, which should yield approximately 11 half double crochets (hdc) across. If you want your headband to be wider, simply increase your starting chain in multiples of 1. On the other hand, if your swatch turns out too small, try going up a hook size to achieve your desired tension. Remember, a little adjustment can make a significant difference in the final size, so take the time to ensure your measurements are just right for your stylish crochet headband!
Step-by-Step Pattern for Cozy Crochet Headband
Row 1: Foundation Chain
Start by making a foundation chain of 12 stitches (ch 12). This will serve as the base for your crochet headband. Ensure your chain is neither too tight nor too loose to provide flexibility in your final piece. The chain should lay flat without twisting.
Row 2: Begin Half Double Crochet
In the 2nd chain from the hook, work a half double crochet (hdc) stitch, then continue hdc across the remaining chains. You will make a total of 11 hdc stitches in this row, giving you a sturdy start for your crochet headband (11 sts). Your work should form a flat line that measures approximately 1 inch wide.
Row 3: Continue the Pattern
Chain 1 (ch 1) at the end of Row 2, then turn your work. Begin the next row by making hdc across all stitches from the previous row. Repeat this process, maintaining consistent tension. After completing Row 3, you should still have 11 hdc stitches (11 sts), and your work will begin to have a nice, solid texture.
Rows 4-48: Build the Length
Continue the pattern by chaining 1 and turning at the end of each row, making hdc across until you reach a total of 48 rows. This will create the desired length for your crochet headband, wrapping nicely around your head. You'll maintain the stitch count of 11 hdc throughout (11 sts).
Step 5: Assemble the Headband
Once your headband has reached the desired length, fold the ends of the piece together to bring the two shorter edges in alignment. You may want to place the ends on top of each other for a neat finish. This will prepare your crochet headband for joining.
Step 6: Join Using Slip Stitch
With your yarn needle at the ready, use a slip stitch (sl st) to join the folded ends together. Insert your hook into both layers to secure them in place. Make sure the join is tight yet comfortable to maintain the overall shape and fit of the headband.
Step 7: Finish Off
After securing your crochet headband, fasten off the yarn, leaving a long tail. Use your yarn needle to weave in any loose ends, ensuring your project looks neat and polished. Checking your work for any missed stitches can help keep your crochet headband tidy and professional-looking.
What to Pair with Your Crochet Headband?
As you delight in your cozy creation, why not explore more matching accessories to elevate your crochet experience?
- Charming Scarf: A lightweight scarf in the same yarn brings cohesive style to your outfit, effortlessly combining warmth and flair.
- Cozy Cowl: A simple cowl is a fantastic companion for chilly days, perfect for draping over your shoulders while showcasing color harmony.
- Stylish Wrist Warmers: Crochet wrist warmers are a quick project that can mirror your headband’s texture and color, adding an adorable touch to your ensemble.
- Matching Hair Ties: Create fun little hair ties that echo your headband's design, perfect for keeping stray hairs in check while staying stylish.
- Sweet Beanie: A matching beanie can transform even the starkest winter days into a chic fashion statement, offering another layer of comfort and coziness.
Embrace the joy of crafting by pairing these delightful projects with your crochet headband!
Care Instructions for Your Crochet Headband
Machine Washing: Select a gentle cycle with cold water, and place your crochet headband in a mesh bag to avoid snagging or stretching.
Hand Washing: If you prefer, gently wash your crochet headband in cool water with a mild detergent, keeping it submerged without agitating to prevent any damage.
Drying/Blocking: Lay your crochet headband flat on a clean towel to dry, reshaping as needed. Avoid direct sunlight to help maintain the color and texture.
Storage: Store your crochet headband in a cool, dry place, ideally folded or laid flat to preserve its shape and prevent any stretching or distortion.
Crochet Headband Variations & Substitutions
There's so much joy in customizing your crochet headband to make it uniquely yours! Embrace creativity and let your imagination run wild.
- Yarn Weight Swap: Use lighter or heavier yarn to adjust thickness; just remember to check your gauge for a perfect fit.
- Fiber Alternatives: Opt for 100% cotton for a breathable summer style or a fluffy yarn for added warmth and softness.
- Color Blocking: Mix and match various yarn colors for a fun, multi-hued headband. It’s a playful way to express your personality!
- Sizing Adjustments: Make the headband wider for extra style or narrower for a more subtle look, ensuring comfort for any wearer.
- Textured Embellishments: Add pom-poms or fringe for a whimsical touch that makes your headband pop with personality.
- Pattern Variation: You could also alternate stitches, like incorporating double crochets, to create a unique textured finish that stands out.
- Added Details: Sew on tiny fabric flowers or bows for a charming embellishment that elevates your headband's appeal.
- Tightening the Fit: If you desire a snugger fit, adjust your foundation chain slightly or add a few rows to ensure it hugs your head comfortably.
Expert Tips for Crochet Headband
-
Maintain Even Tension: Keep a consistent grip on your yarn to avoid uneven stitches, which may alter the fit of your crochet headband.
-
Count Regularly: Check your stitch count after every few rows to ensure you’re on track. Losing count can lead to unexpected size changes.
-
Use Blocking Techniques: Lightly block your headband after completion to enhance its shape and prevent curling. This extra step ensures a polished look.
-
Seam Wisely: When joining the ends, make sure your slip stitch is snug yet flexible to maintain comfort. A tight seam could alter the fit.
-
Weave in Ends Neatly: Before wrapping up your project, spend a moment weaving in any loose ends for a tidy finish. A neat presentation elevates the look of your crochet headband.
Cozy Crochet Headband FAQs
Can I substitute the yarn for my crochet headband?
Absolutely! While a worsted weight yarn blend of acrylic and wool is recommended, you can swap it for cotton yarn for a breathable headband or a fluffy yarn for a softer texture. Just be mindful that yarn weight might affect the overall fit and drape.
How can I adjust the size of my crochet headband?
It's easy! To make your headband wider or narrower, simply adjust the foundation chain by adding or subtracting stitches in multiples of two to retain the stitch pattern. For length adjustments, continue to work more or fewer rows until you reach your desired size.
Why is my crochet headband curling?
Don't panic! Curling often occurs due to tight stitches. If you notice it happening, try blocking your headband lightly to help shape it. Also, maintaining even tension during your work can prevent this issue from cropping up again.
What hook size should I use for the crochet headband?
I recommend a 5.0 mm (H-8) crochet hook, especially since half double crochet stitches are used in this pattern. However, if you're a tight crocheter, you might want to go up a hook size to help achieve a more flexible and cozy result.
How do I fix a dropped stitch in my crochet headband?
It's an easy fix! If you notice a dropped stitch, simply carefully pull the working yarn to loosen the stitches above it, then use a crochet hook to grab the dropped stitch and work it back into place. Take it slowly to avoid additional drops!
What can I do if my headband feels too tight?
If your headband feels snug, check your tension and ensure you’re not crocheting too tightly. You can also try stretching it gently when blocking or consider using a larger hook size next time for a looser fit. Comfort is key!

Leave a Reply