
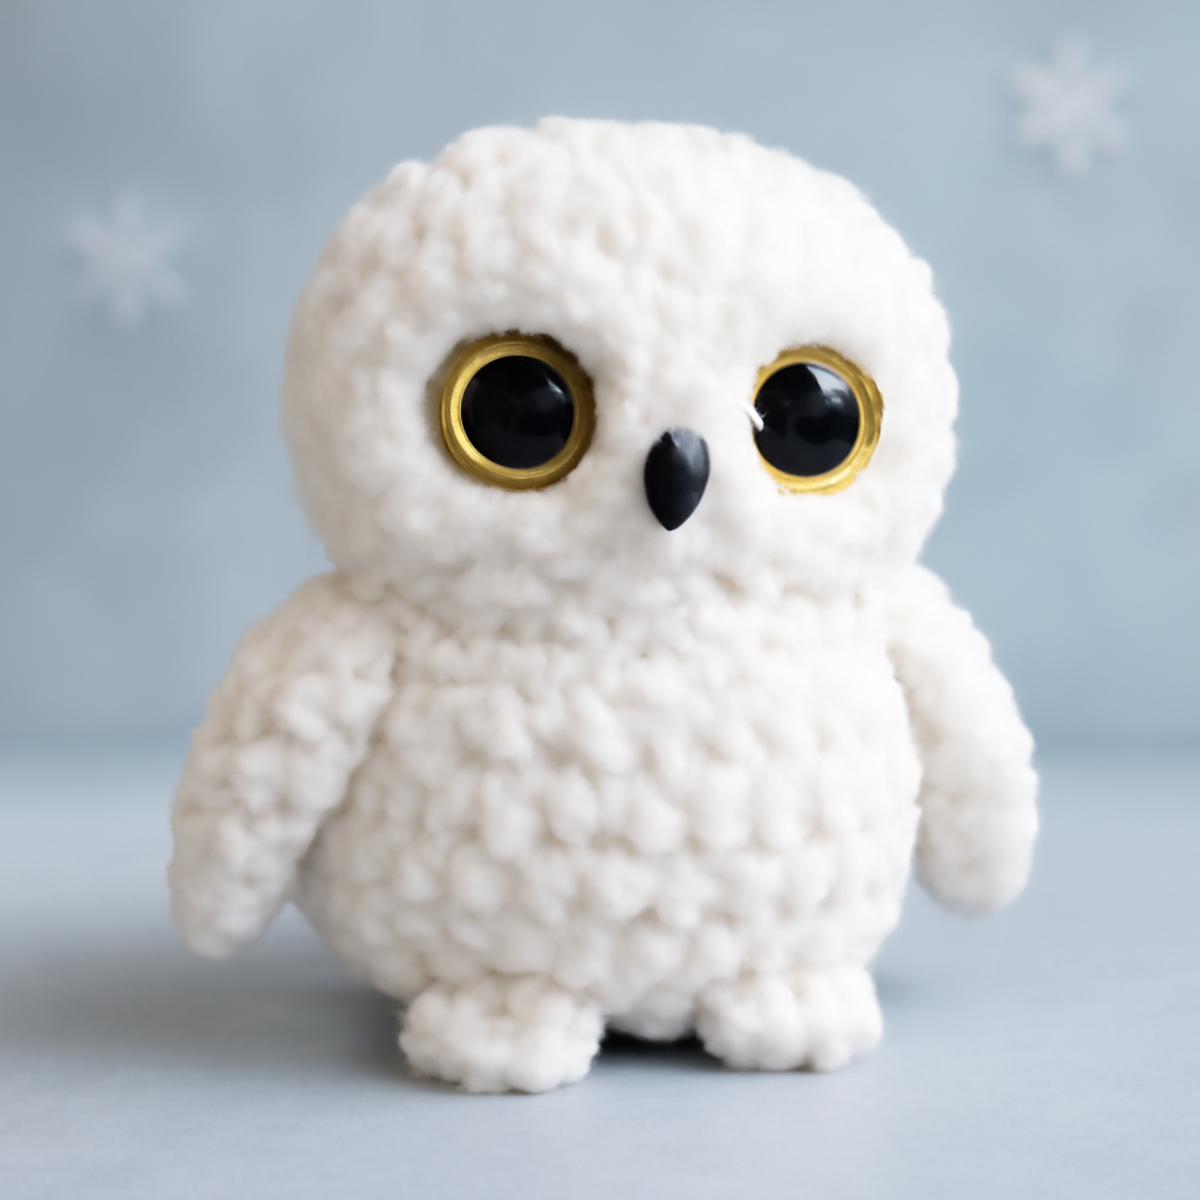
As I sat by the fireplace, yarn in hand, a playful thought flitted through my mind—what better companion for chilly winter evenings than a cozy snow owl crochet plush? Dive into the enchanting world of this snow owl crochet pattern, crafted especially for beginners. With simple stitches and an easy assembly process, this whimsical project promises not just a delightful creation, but a heartwarming keepsake perfect for gift-giving or seasonal decor. The fluffy chenille yarn lends this charming owl a soft touch that's sure to beg for cuddles long after the holidays are over. Get ready to bring warmth and cheer into your space, and I can’t wait to see the lovely creations you’ll make!
Cozy Snow Owl Crochet Materials & Tools
- Chenille Yarn – Approximately 200-250 yards of soft white chenille yarn adds a fluffy texture to your snow owl crochet plush.
- 4.0mm (G-6) Hook – This size hook is perfect for achieving tight stitches that prevent holes in the plush fabric.
- 10mm Gold Glitter Safety Eyes – These cute eyes add a whimsical touch and secure safety for children.
- Polyester Stuffing – Use this to fill your plush, making it cuddly and perfect for snuggling.
- Yarn Needle – Ideal for assembly, using a larger needle helps avoid splitting the chenille fibers for cleaner seams.
- Stitch Markers – Helpful in tracking rounds; they ensure a clear progression throughout your snow owl crochet project.
- Scissors – Don’t forget these for snipping yarn ends and making clean cuts as you work!
Why Make a Snow Owl Crochet?
Beginner-Friendly: This snow owl crochet pattern is designed with simplicity in mind, making it perfect for crafters new to crochet.
Whimsical Aesthetic: The enchanting design captures the essence of winter, adding charm and warmth to any decor or gifting occasion.
Soft Chenille Texture: Crafted with chenille yarn, this plush toy boasts a delightful softness that's perfect for snuggling, ensuring lasting appeal.
Heartwarming Keepsake: Each finished snow owl serves as a cherished memento, brightening up a child's day or delighting loved ones during the festive season.
Quick and Rewarding: With a clear assembly process, you’ll enjoy a satisfying crochet experience that results in a beautiful finished product in no time!
Gauge & Sizing Notes
Don't skip the gauge swatch! Ensuring your tension is consistent is crucial for creating a charming snow owl crochet plush that looks just right. A general guideline to aim for is a tension swatch of approximately 4×4 inches (10×10 cm) with 16 single crochets and 14 rows. If your gauge doesn't match, and your swatch is too small, try going up a hook size to achieve a looser stitch. To modify the size of your snow owl crochet plush, adjust your starting chain by multiples of 6 to make it wider or narrower as desired. Happy crafting, and enjoy the warmth of your creations!
Step-by-Step Pattern for Cozy Snow Owl Crochet
Row 1: Magic Ring for the Head
Begin by forming a magic ring (MR). Inside the ring, crochet 6 single crochets (sc). Pull the tail of the yarn to tighten the ring. As you complete this round, your work should form a small circle. This creates the foundation of the snow owl's head (6 sts).
Row 2: Increasing the Head
In this round, start by crocheting 2 single crochets in each stitch (inc) around. This will help shape the head, expanding it evenly. After completing this round, your project should feel fuller, and you'll have a familiar rounded form starting to appear (12 sts).
Row 3: More Increases for the Head
Continue to increase by crocheting 1 single crochet in the first stitch followed by 2 single crochets in the next (1 sc, inc) around. This pattern adds more depth to the head while ensuring a smooth curve is forming. You will notice your work beginning to cup beautifully (18 sts).
Row 4: Shaping the Head Further
For this round, crochet 2 single crochets followed by an increase in the next stitch (2 sc, inc) around. By this point, the shape of your snow owl’s head should be visibly rounding out, creating a soft and plump appearance (24 sts).
Row 5: Single Crochet Rounds
Now, crochet 1 single crochet in each stitch around. This round is dedicated to stabilizing your work, allowing the shape to start defining itself. Your project should feel more substantial but still soft and inviting with the chenille yarn (24 sts).
Row 6: Start the Body with Increasing Rounds
Transitioning to the body, continue with an increasing pattern of 3 single crochets followed by an increase (3 sc, inc) around. You’ll see the body developing and should feel excitement about how your snow owl crochet plush is taking shape (30 sts).
Row 7: Continue Building the Body
For this round, crochet 4 single crochets followed by an increase (4 sc, inc) around. The body will be forming a gentle curve, allowing the overall design to appear cozy and plump. The curve will be more visible now (36 sts).
Row 8: Stabilizing the Body
Now work 1 single crochet in each stitch around. This round serves to stabilize the body, giving it a solid foundation for future components. The chunky body should be embracing the shape well and feeling plushy (36 sts).
Step 9: Legs and Tail Formation
For the legs, you can transition to smaller components. Create a magic ring and crochet 4 single crochets for each leg. Position them at the bottom of the body later. Repeat the magic ring for the tail with 6 single crochets, ensuring the tail curls gently for aesthetic balance.
Step 10: Assembly
After completing the head, body, legs, and tail, it’s time to assemble your snow owl crochet plush. Fill the head and body loosely with polyester stuffing to achieve a cuddly feel. Securely position the safety eyes on the head and sew on the wings and tail to finish the assembly.
Step 11: Edging (Optional)
To add a cute finishing touch, you can crochet a simple edging around the base of your snow owl. Use slip stitches (sl st) along the bottom to create a textured border. Your cozy snow owl crochet plush is now complete and ready to be cherished!
Expert Tips for Snow Owl Crochet
-
Consistent Tension: Maintain even tension throughout your project, especially in the head and body sections, to keep your snow owl crochet plush uniform and aesthetically pleasing.
-
Track Your Stitches: Use a stitch marker to easily track the beginning of each round, preventing confusion and ensuring you don’t accidentally lose count during the cozy assembly process.
-
Avoiding Splits: Opt for a larger yarn needle when assembling your plush; this helps prevent splitting the chenille fibers, resulting in cleaner, neater seams that highlight your craftsmanship.
-
Correct Placement: When positioning the safety eyes, double-check their alignment before securing them—this ensures your owl has the cutest expression possible!
-
Stuffing Evenly: Distribute polyester stuffing evenly within the body and head to achieve a balanced look, helping your snow owl crochet plush maintain its adorable shape.
What to Pair with Winter’s Cuddle: Snow Owl Crochet Plush?
As you create your enchanting snow owl crochet plush, consider crafting a delightful matching ensemble to enhance your cozy winter decor.
- Charming Owl Beanie: A whimsical beanie featuring owl ear details complements your plush beautifully, perfect for chilly outings.
- Soft Chenille Blanket: Craft a snug blanket using the same luscious chenille yarn—ideal for curling up while admiring your snow owl crochet creation.
- Matching Wingspan Scarf: A cozy scarf with flowing motifs mimicking your owl’s wings adds warmth and style, creating a charming winter look.
- Feathered Keychain: Make a mini owl keychain as a sweet accessory or gift, keeping your cozy creation close wherever you go.
- Wintery Decor Garlands: Connect several tiny snow owls or winter motifs to create a whimsical garland, perfect for draping over mantels or doorways.
Snow Owl Crochet Variations
Get ready to personalize your snow owl crochet plush and let your creativity soar—your cozy companion awaits!
-
Yarn Substitutions: Use a soft cotton yarn for a lightweight, breathable version that’s perfect for warmer seasons.
-
Color Variations: Try pastel shades like soft pinks or lavender to create a whimsical twist on the classic snow owl aesthetic.
-
Size Adjustments: Swap out for bulky yarn and a larger hook to create a huggable oversized owl, perfect for cuddles!
-
Textured Embellishments: Add a fuzzy pom-pom on top of the head, giving your owl an adorable hat and extra charm.
-
Mini Version: Use sport-weight yarn and a smaller hook for a cute mini owl; it's a perfect companion for little hands!
-
Pattern Mixing: Combine elements with a different animal crochet pattern, such as adding bear ears instead of wings for a unique take.
-
Fringe Details: Create whimsical feathers by adding fringe along the wings and tail, introducing playful movement to your plush.
-
Seasonal Accessories: Stitch a cozy scarf or a festive holiday bow to give your snow owl a cheerful look for every occasion!
How to Wash and Care for Your Snow Owl Crochet
-
Machine Washing: Use a gentle cycle with cold water to prevent felting and pilling. Make sure to place your snow owl crochet plush inside a mesh laundry bag for added protection.
-
Hand Washing: For a more delicate approach, immerse your snow owl in cold water with mild detergent, gently squeezing to clean. Avoid rubbing or agitating the plush to keep its fluffy texture intact.
-
Drying/Blocking: Lay your snow owl flat on a clean, dry towel in a well-ventilated area to dry. Avoid hanging it, as this could distort the shape of your cozy creation.
-
Storage: To keep your snow owl crochet plush in perfect condition, store it in a cool, dry place. Consider using a cotton bag or a breathable container to protect it from dust while ensuring airflow.
Cozy Snow Owl Crochet FAQs
Can I use a different yarn instead of chenille for this snow owl crochet?
Absolutely! While chenille gives the owl its lovely soft texture, you can substitute it with a similar weight yarn, such as acrylic or cotton. Just keep in mind that the final plush may feel different, so consider testing your gauge if you switch to a non-fuzzy yarn.
How can I make the snow owl crochet plush larger or smaller?
To adjust the size, you can either change the yarn weight (using a thicker yarn will make it larger) or alter the hook size to create a tighter or looser fabric. Swapping to a smaller hook can help you achieve a mini version of your cute snow owl!
Why does my work keep curling up?
Don’t panic! Curling can occur, especially at the edges. This usually happens from tight tension. To correct it, ensure you’re not pulling too tight when making your stitches. If you’re seeing curling in finished pieces, try blocking your work flat—it can help reshape it into a better form!
How do I fix a dropped stitch in my snow owl crochet?
It’s an easy fix! Simply use a yarn needle or your crochet hook to pick up the dropped stitch and pull it back through. Then, secure it with a small knot in the back, or weave it in for a polished look. Remember, everyone makes mistakes; it’s part of the journey!
What size hook should I use for this pattern if I want a tighter finish?
For a tighter gauge, feel free to size down to a 3.5mm (E-4) hook. This will help create a firmer plush that holds its shape beautifully. Just ensure to check that your stitches remain comfortable for you to work with as you go along!
How can I ensure my safety eyes stay secure during play?
To ensure the safety eyes are secure, be sure to push them through a few rounds of stitches in the head, and secure them with the included washer. Additionally, placing a small dot of fabric glue can provide added peace of mind, making sure your owl feels safe for any little ones!

Leave a Reply