
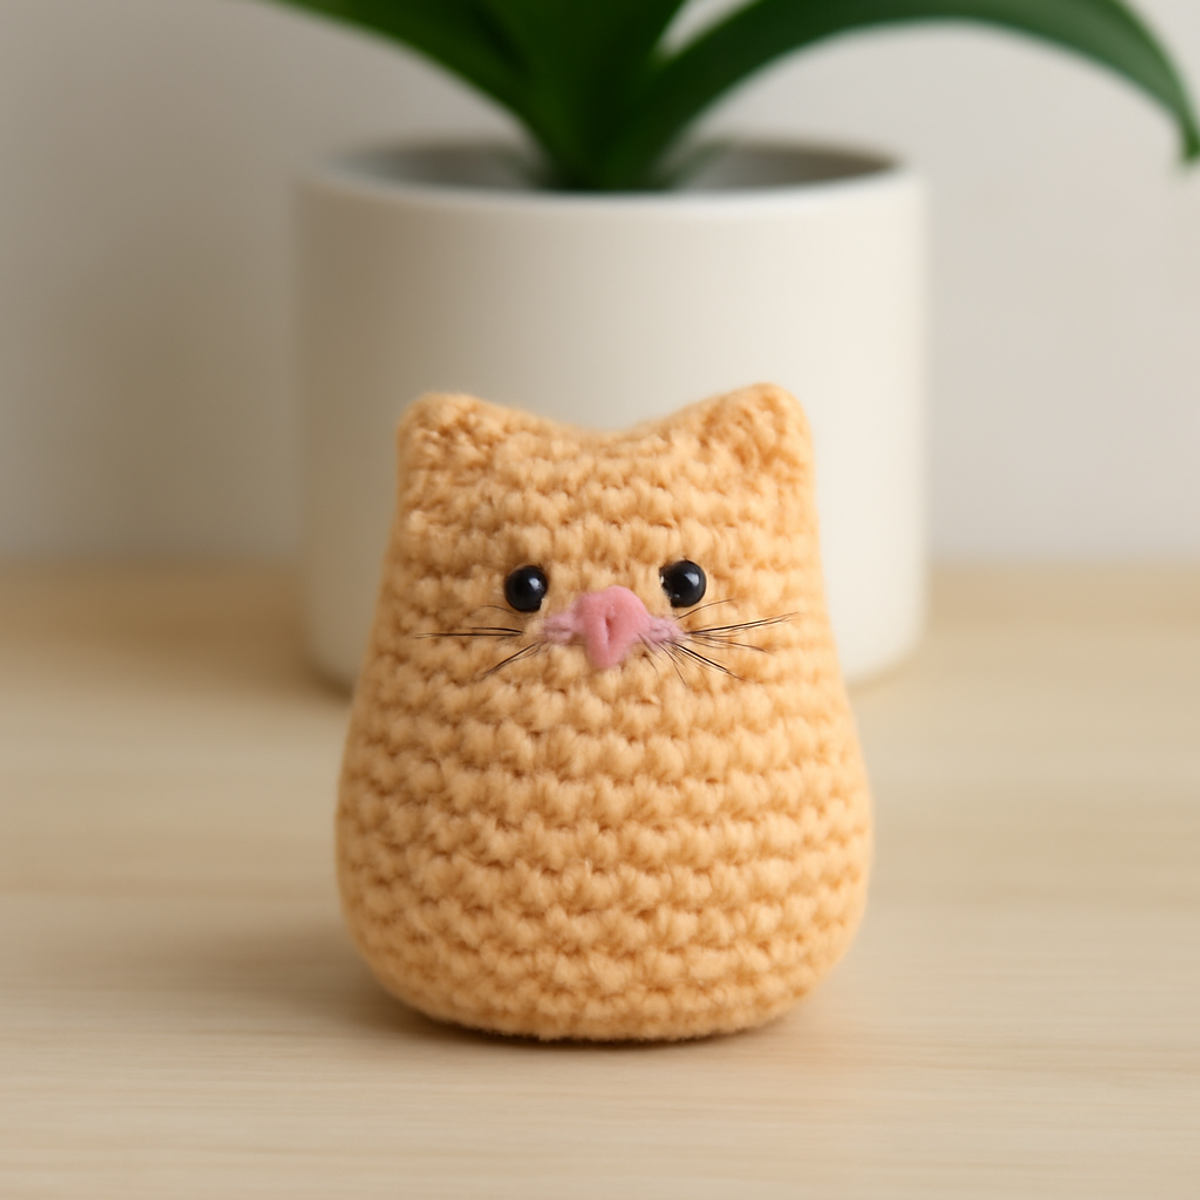
As I worked on my latest crochet adventure, the gentle squish of yarn between my fingers reminded me of the simple joys that tiny amigurumi kitties bring. Meet the “Itty Bitty Kitties”—adorable little companions that add warmth and charm to any nook of your home. Perfect for those seeking a quick project, these delightful kitties work up fast, ensuring instant gratification, whether you're crafting a thoughtful gift or decorating a child's room. With the chance to play with an array of colors, this pattern invites you to unleash your creativity while honing your crochet skills. Ready to curl up with your hook and bring these playful felines to life? Let’s dive in and transform some yarn into cuddly kitties!
Itty Bitty Kitty Materials & Tools
-
Yarn
- Medium Weight Yarn (Worsted/Weight 4) – An acrylic or cotton blend works best for creating soft and durable amigurumi; you'll need approximately 50 yards per color.
-
Tools & Notions
- 3.5mm to 4.0mm (E/4 to G/6) Hook – This size ensures a snug stitch consistency, keeping stuffing from showing through your adorable itty bitty kitties.
- Black Safety Eyes – Perfect for giving your kitties a charming and playful expression.
- Yarn Needle – Essential for assembly and weaving in ends once your project is complete.
- Stitch Markers (optional) – Helpful for counting rounds and keeping track of your progress throughout this delightful project.
Why Will You Love the Itty Bitty Kitties?
Instant Gratification: These tiny amigurumi kitties work up quickly, providing you with a delightful finish in no time. Beginner-Friendly: Designed for crafters of all levels, this pattern allows beginners to build confidence while creating. Customization Galore: Experiment with different colors and embellishments to make each kitty unique, bringing your personal touch to every creation. Cuddly Texture: The soft, squishy fabric makes these little felines irresistibly huggable, perfect for little hands or charming decor. Whimsical Charm: Each cute kitty exudes character, making them wonderful gifts or treasured keepsakes that add charm to any space!
Gauge & Sizing Notes
Don't skip the gauge swatch! Ensuring you have the right tension is crucial for your itty bitty kitties to turn out perfectly cute and compact. A standard guide for this project is approximately 4×4 inches (10×10 cm) should equal around 20 single crochets by 24 rows, though actual measurements may vary based on yarn and hook size. To make your kitties larger or smaller, simply adjust your starting chain in multiples of 6 and keep in mind that if your tension doesn't match, you can easily switch to a larger hook size to loosen your stitches. Happy crocheting, and enjoy creating your delightful itty bitty kitties!
Step-by-Step Pattern for itty bitty kitty
Row 1: Start the Body
Begin by making a magic ring. Ch 1, then work 6 sc into the ring, pulling tight to close it. This forms the base of the body. Your work should feel circular, keeping it snug for stuffing later. You should have (6 sts) in this round.
Row 2: Increase Round
For the second round, make 2 sc in each st around to increase size. This will start to shape your itty bitty kitty's body. Remember, the stitches should feel even and tight, creating a nice rounded form. You will have (12 sts) by the end of this round.
Row 3: Continue to Increase
In this round, work 1 sc in the next st, then 2 sc in the next st (repeat this pattern around). This technique creates a gentle increase to give shape as your kitty grows. By the end of this round, you should count (18 sts), and the body should begin to cup nicely.
Row 4: More Increases
Continue building the body by attaching 1 sc in the next 2 sts, followed by 2 sc in the following st (repeat this pattern). You'll notice the figure expanding, preparing for the plush shape of your itty bitty kitty. This round will yield (24 sts) at its conclusion.
Row 5-9: Straight Body
For rounds 5 through 9, simply work 1 sc in each st around. This creates the straight sides of your kitty’s body, offering stability. Keep your stitches cozy yet firm, so the stuffing won't peek through later. Your kitty should be reaching about 2 to 3 inches in height by the end of round 9.
Row 10: Begin Decrease
For this round, work 1 sc in the next 2 sts, then dec (decrease) in the following st (repeat). The transition will shape the body into the adorable head of your itty bitty kitty. As you complete this round, you’ll finish with (18 sts).
Row 11: Continue Decreasing
Continue the decrease pattern with 1 sc in the next st, then dec in the following st (repeat). You should start to see the head taking shape. Keep a close eye on your stitch count, ensuring you have (12 sts) before proceeding.
Row 12: Final Decrease
For the last round, work dec around until the hole is closed. Your head and body are now beautifully formed. It should feel compact and sturdy to the touch. You will have (6 sts) remaining. Fasten off, leaving a long tail for sewing.
Step 1: Making Ears
To create the ears, start with a magic ring again. Ch 2, then work 4 hdc into the ring. Pull tight to close the ring. You should see a small triangle shape that will form the kitty's ears. This round should provide (4 sts).
Step 2: Complete Ears
For the second round, work 1 hdc in each st around to increase slightly. These ears should still appear small and cute when finished. By the end of this round, you’ll have (4 sts). Fasten off and leave a tail for attaching them to the head.
Step 3: Assemble Your Itty Bitty Kitty
To assemble, use your yarn needle to attach the ears to the top of the head securely. Position them how you’d like for your kitty’s expression. Weave in all loose ends to ensure a clean finish. Your itty bitty kitty should be coming together beautifully now!
Step 4: Add Facial Features
With safety eyes or embroidery, add facial features to your kitty as desired. Consider a sweet stitched nose and a smile to bring your itty bitty kitty to life. Attach securely, so they stay in place, ensuring your work is as enduring as it is adorable.
Step 5: Final Touches & Stuffing
Lightly stuff the body and head through the remaining opening, making sure they’re evenly filled. You can also block them gently to shape any uneven stitches if necessary. Your tiny kitties should now be purr-fectly squishy, ready to charm anyone who sees them!
Itty Bitty Kitty Variations & Substitutions
Unleash your creativity with delightful twists on this adorable pattern that will make each kitty truly yours!
- Yarn Swaps: Opt for cotton yarn for a lighter, breathable finish, or try a soft acrylic for added squishiness.
- Color-Blocking: Create a variety of kitties by experimenting with color-blocking techniques; swap each kitty's colors for a dynamic display.
- Larger Versions: Use a bulkier yarn and a larger hook to craft larger kitties that stand out as charming decorative pieces.
- Texture Addition: Incorporate a fluffy yarn to create an irresistibly soft kitty, perfect for snuggling or gifting to little ones.
- Different Eyes: Swap safety eyes for felted or embroidered eyes to give your kitties a unique personality, adding a handcrafted feel.
- Embellishments: Add tiny bows, collars, or pom-poms for extra flair, making each kitty a fun, personalized creation.
- Height Adjustments: Modify the number of rounds to make either shorter or taller kitties, allowing for a family of varying sizes.
- Fringe Fun: Attach tiny fringe on the tails for a playful touch, encouraging creativity and fun in your amigurumi journey.
What to Pair with Itty Bitty Kitties?
As you fill your home with playful charm, consider creating a matching ensemble that enhances your crochet journey.
-
Snuggly Cat Bed: Craft a cozy spot for your Itty Bitty Kitties to rest, creating a whimsical habitat. Your tiny friends will feel right at home!
-
Mini Cat Toys: Tiny crochet mice or fish will delight your kitties, adding a playful element to your crafting experience. These interactive toys can bring even more joy!
-
Charming Amigurumi Dogs: Balance out your collection with some equally adorable dog companions for a delightful duo that brings smiles to all.
-
Whimsical Baskets: Create small baskets to hold your kitties or other crafty treasures; they can be a perfect storage solution while remaining stylish.
-
Cute Kitty Bunting: Make a festive garland of amigurumi kitties to celebrate your crochet achievements. It’s a playful decoration that enhances any space!
Expert Tips for Itty Bitty Kitties
-
Tight Tension: Start with slightly tighter tension, especially when using lighter colors, to prevent stuffing from showing through your cute itty bitty kitty.
-
Count Your Stitches: Frequently count your stitches after each round. This ensures your kitty remains perfectly rounded and avoids any unintended shaping mishaps.
-
Block Lightly: Don’t hesitate to lightly block your finished kitties. This will help even out any uneven stitches and give your amigurumi a polished appearance.
-
Attach Ears Securely: When sewing on the ears, ensure they're securely attached, as this will enhance your kitty's playfulness and prevent them from falling off.
-
Stuff Gradually: Stuff the body and head gradually, ensuring an even fill throughout. Avoid overstuffing, as it might affect the darling shape of your itty bitty kitty.
Care Instructions for Itty Bitty Kitties
-
Machine Washing: Use cold water on a gentle cycle to avoid any agitation that may cause felting or pilling of your itty bitty kitties. Place them in a mesh laundry bag for added protection.
-
Hand Washing: If preferred, hand wash your kitties gently in cold water with mild soap. Avoid scrubbing or twisting the fabric to keep the delicate shape intact.
-
Drying: After washing, lay your kitties flat on a clean towel to dry. Reshape as needed while damp to maintain that charming amigurumi form.
-
Storage: Store your finished itty bitty kitties in a cool, dry place. Keep them in a dust-free container to preserve their playful look and softness.
Itty Bitty Kitties: Adorable Amigurumi Cats FAQs
Can I use different yarn types for my itty bitty kitties?
Absolutely! While a medium weight yarn (Worsted/Weight 4) is recommended for these cheerful amigurumi, you can experiment with different yarn types. Just ensure the yarn is soft and holds its shape well. If you opt for a fluffy yarn, for example, your kitties will have a unique texture!
How can I make my itty bitty kitties bigger or smaller?
To adjust the size of your kitties, you can use a thicker yarn and corresponding hook to create larger versions or a finer yarn for smaller ones. Just remember to keep an eye on your tension and stitch count to maintain that charming amigurumi shape!
Why is my work curling while I crochet?
Don't panic! Curling can happen, especially with tight tension. I recommend checking your gauge first. Make sure your stitches are even and relaxed. If you notice curling, try loosening your tension slightly, which should help flatten your work as you progress.
How do I fix dropped stitches?
It's an easy fix! Simply use your yarn needle to pick up the dropped stitch, threading it back through the loops. If the stitch has unraveled into a gap, you can also crochet a new stitch to fill it in, which will keep your itty bitty kitty looking adorable!
What hook size should I use for my itty bitty kitties?
For best results, a hook size of 3.5mm to 4.0mm (E/4 to G/6) is ideal. This size ensures a snug stitch consistency, preventing the stuffing from showing through while also helping achieve that soft and cuddly finish we all love!
Is there a way to make the facial features different?
Definitely! While safety eyes are a great choice for a playful expression, consider swapping them out for stitched or felted eyes for a softer look. You can also customize the facial features using embroidery for some added charm and personality, making each itty bitty kitty uniquely yours!

Leave a Reply