
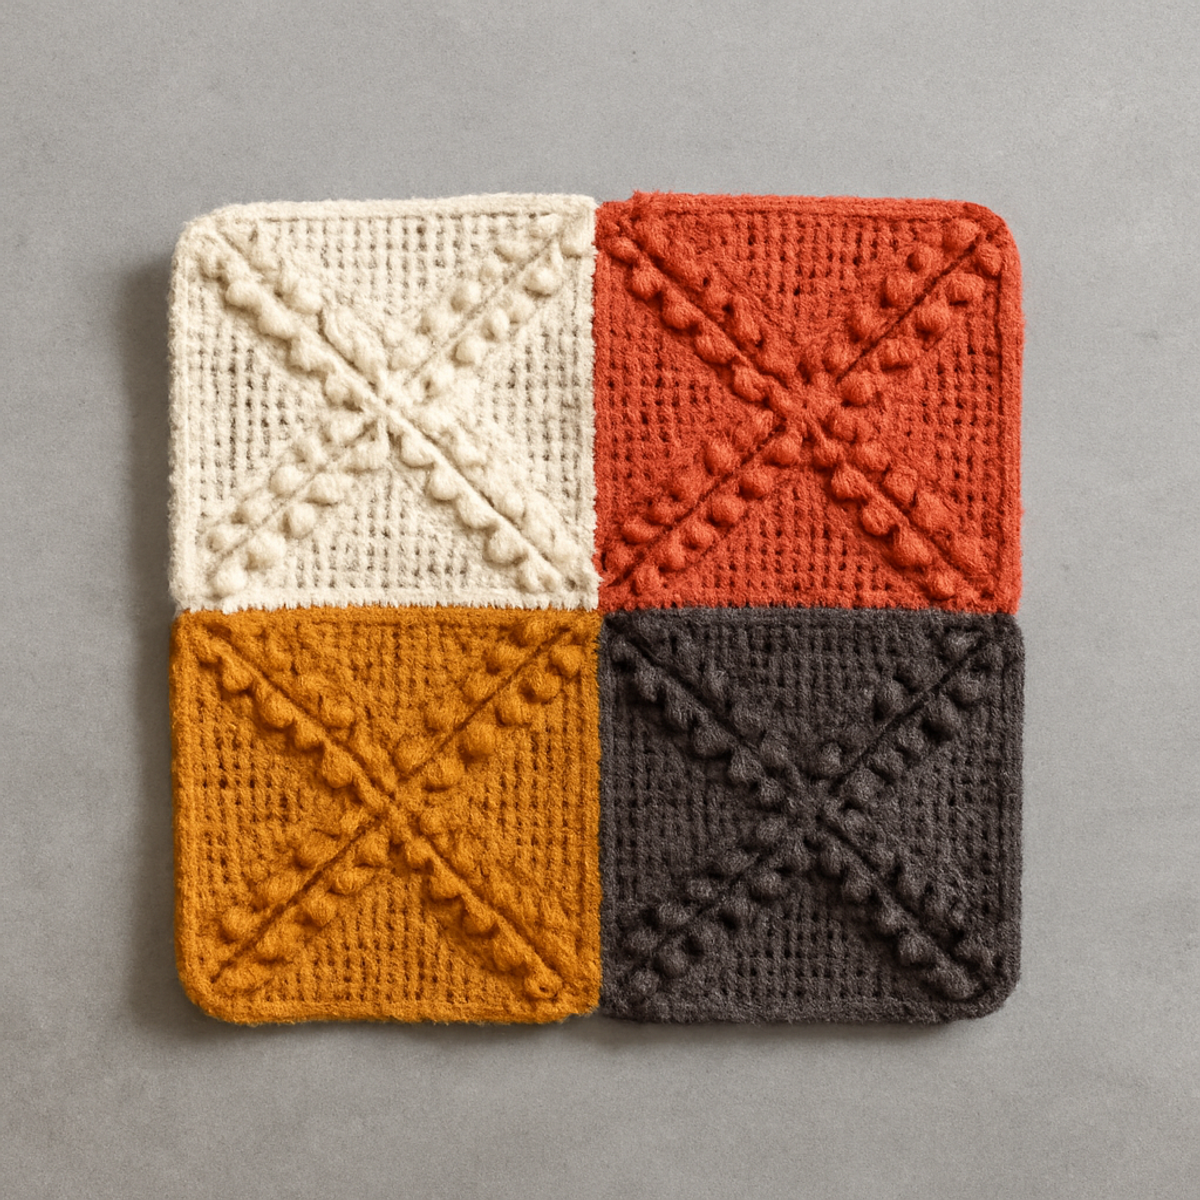
As I sat on my cozy couch, the sunlight streaming through the window, it hit me how lovely it would be to decorate my home with warmth and charm. Enter the Farmhouse Granny Square—a delightful crochet granny square project that brings rustic elegance to life! With its playful colors and intricate stitches, this pattern welcomes even those at an intermediate skill level to create stunning home décor items. Not only will these squares amp up your creative flair, but they’re also perfect for using up that stash of scrap yarn piling up in your basket. Picture mixing soft creams, vibrant rusts, and rich earthy tones as you craft each square into beautiful blankets, pillows, or even stylish bags. Are you ready to transform your yarn into cozy works of art? Let’s stitch those squares together!
Crochet Granny Square Materials & Tools
Note: Gather these supplies to start your cozy crochet granny square project!
- Worsted Weight Yarn (4) – Use an acrylic or cotton blend in shades of cream, rust orange, rich yellow, and deep brown for that farmhouse charm; you'll need about 50-75 yards per square.
- 5.0mm (H-8) or 6.0mm (J-10) Hook – Choose based on your preferred stitch density to craft lovely, consistent squares.
- Stitch Markers – Keep track of your rounds easily, ensuring your crochet granny square comes out perfectly!
- Scissors – Handy for snipping ends as you go, making your project neat and tidy.
- Tension Ring (optional) – Maintain even tension for beautiful results throughout your squares; an easy tool to help you focus on your grip!
Why Choose the Crochet Granny Square?
Versatile Design: The Farmhouse Granny Square is perfect for various home décor projects, allowing you to unleash your creativity through unique combinations of squares.
Charming Aesthetic: With its warm color palette of earthy tones, this pattern elevates your space, making it cozy and inviting.
Ideal for Scrap Yarn: Use up those leftover yarn bits while crafting something beautiful—an economical and sustainable choice!
Intermediate-Friendly Steps: The pattern encourages skill enhancement through alternating colors and textured stitches, making it an enjoyable challenge.
Perfect Size: Each square measures around 6-8 inches, making it easy to assemble into larger items like blankets or throws, without feeling overwhelming.
Gauge & Sizing Notes
Don't skip the gauge swatch! Checking your tension is essential for the crochet granny square project to ensure each square turns out perfectly sized and consistent, especially if you’re aiming for a beautiful blanket or decorative pillow. A general guideline to follow is to aim for a 4×4 inch (10×10 cm) square with approximately 12 double crochets by 8 rows. To adjust the size of your squares, increase your starting chain in multiples of 3 for wider squares or decrease for smaller ones. If your tension doesn't match the desired gauge, simply try a larger hook size to loosen up those stitches, making your crafting experience a joy!
Step-by-Step Pattern for Cozy Crochet Granny Square
Row 1: Create the Center
Start by making a magic circle. Chain 3 (counts as 1 dc), then crochet 11 dc into the circle. Pull the tail to tighten the circle and join with a sl st to the top of the initial ch-3. Your magic circle should now have 12 dcs and should feel cozy and tightly gathered at the center (12 sts).
Round 2: Form the First Rounds
Ch 3 (counts as 1 dc), then in the same stitch, make 2 dc, ch 1, and 3 dc in the next stitch. Repeat this pattern around the circle: 3 dc, ch 1 into each stitch, joining with a sl st to the top of your starting ch-3. Your round should look like petals, creating an inviting flare (24 sts, with 12 ch-1 spaces).
Round 3: Build the Corners
Ch 3 (counts as 1 dc) and make 2 dc in the first ch-1 space, ch 1. In each ch-1 space, make 3 dc, ch 1, then 3 dc for a raised texture. Join with a sl st to the top of the initial ch-3. The granny square should now have defined corners that add dimension and charm (36 sts, with 12 ch-1 spaces).
Round 4: Change Colors (Optional)
When ready to change colors, slip stitch into the next ch-1 space. Join the new color, ch 3 (counts as 1 dc), and make 2 dc, ch 1, and 3 dc in the same space. Repeat in each corner’s ch-1 space around, joining with a sl st to finish. Your crochet granny square will start to showcase its colorful personality (48 sts, with 12 ch-1 spaces).
Round 5: Add Texture
Adding texture, repeat Round 4 while using a popcorn stitch instead of regular dc within the corners: 5 dc in one corner, drop the loop, insert the hook back into the first dc to pull through. Join with a sl st, then continue around. Your granny square should exhibit a delightful texture and festive flair (60 sts, with 12 corners featuring popcorn stitches).
Step 6: Final Edging
For the border, switch to a neutral color and join it to any stitch. Ch 1 (counts as 1 sc) and then work 1 sc in each stitch around, making 3 sc in each corner to maintain shape. Join with a sl st to the first sc. Your crochet granny square should now have a polished, well-defined edge, ready to adorn your cozy home (72 sts).
What to Pair with Farmhouse Granny Square
As your cozy crochet granny square creates a delightful vibe, consider these charming pairings to enhance your home decor.
- Textured Throw Pillow: Craft a pillow using the same earthy colors, adding a soft touch to your space while showcasing your crochet skills.
- Matching Blanket: Combine your granny squares into a larger blanket for the perfect warm accent on chilly evenings. It’s a practical and beautiful project!
- Stylish Tote Bag: Create a trendy bag with leftover squares for errands while bringing a touch of farmhouse charm to your daily routine.
- Cozy Rug: Use larger squares made from durable yarn for a welcoming area rug that transforms your living space into a warm oasis.
- Decorative Wall Hanging: Turn a few squares into an eye-catching wall display, inviting that cottage appeal into any room, and inspiring warmth.
Each pairing beautifully complements the crochet granny square project, adding layers of charm to your crafting journey.
Crochet Granny Square Variations
Discover the delightful world of customization with your crochet stitches, allowing your creativity to shine!
-
Yarn Weight Swap: Try using a lighter weight yarn for an airy feel. This change will also create more delicate squares perfect for springtime décor.
-
Color Palette Play: Experiment with pastel shades for a soft, whimsical look. Picture your cozy living room glowing with gentle hues to lift the spirits!
-
Thicker Yarn Adventure: Opt for a bulky yarn to create larger squares quickly. This option not only speeds up the project but adds a cozy texture for winter blankets.
-
Stitch Variation: Incorporate half-double crochets in place of double crochets for added texture. This twist can make your squares stand out while providing a delightful depth.
-
Fringe Flip: Add playful fringe to the edges of your squares for a fun bohemian touch. It’s a fabulous finishing detail that brings a charming flair to your creations!
-
Unique Borders: Instead of a simple edging, try a scalloped border for a romantic finish. This little detail will elevate your granny squares into true works of art.
-
Large Project Fusion: Combine multiple squares into a vibrant throw or wall hanging. Each square can tell its story, blending beautifully into an eye-catching masterpiece.
-
Corner Popcorn Stitches: Utilize popcorn stitches at the corners for a raised texture that draws attention. This modification not only enhances the visual appeal but also adds tactile interest!
How to Wash and Care for Your Crochet Granny Square
Machine Washing: Use cold water on a gentle cycle to protect your crochet granny square's shape and prevent felting. It's essential to avoid agitating the yarn too much.
Hand Washing: For extra tenderness, hand wash your squares in cool water with a mild detergent. Gently squeeze out excess water—no wringing allowed to preserve their lovely drape.
Drying/Blocking: Lay your crochet granny square flat on a clean, dry towel to reshape it as it dries. Blocking enhances the stitch definition and helps maintain its charming, rustic aesthetic.
Storage: Store your finished squares in a cool, dry place, away from direct sunlight. Use breathable storage bags to avoid moisture and keep them cozy until you're ready to assemble your projects.
Expert Tips for Crochet Granny Square
-
Consistent Tension: Ensure even tension by practicing a relaxed grip. This will help avoid tight stitches that can distort your square's shape.
-
Stitch Markers: Use a stitch marker to highlight the first stitch of each round. This keeps you from losing count and ensures a neat finish.
-
Counting Confidence: Regularly count your stitches after each round. This helps catch mistakes early and keeps your crochet granny square uniform in size.
-
Blocking Benefits: Don't skip blocking your completed squares! This process allows them to lie flat and showcases the intricate stitchwork beautifully.
-
Color Changes: When changing colors, be mindful to crochet over your old color's tail. This prevents loose ends and ensures a smoother transition between hues.
Cozy Crochet Granny Square FAQs
Can I substitute yarn types for the crochet granny square?
Absolutely! You can swap acrylic yarn for a cotton blend if you prefer a different texture, though you may notice slight changes in drape. Just ensure your substitution is similar in weight—aim for worsted weight (4) for the best results!
How can I make my crochet granny square bigger or smaller?
To adjust the size, you can change your hook size to a larger one for a bigger square or use a thicker yarn for a cozier outcome. If you want a smaller square, simply reduce the number of rounds or use a smaller hook, but keep in mind this might affect the overall design!
Why is my crochet granny square curling at the edges?
Don’t panic! Curling often occurs due to tension issues or if you’re not following the stitch count accurately. Make sure you’re crocheting with even tension and double-check that you're adding the right number of stitches, especially in the corners.
What hook size should I use for the crochet granny square?
The recommended hook size is 5mm (H-8) or 6mm (J-10), depending on your preferred stitch density. If you’re a tighter crocheter, go for the larger hook to help your squares lie flat and maintain a cozy feel.
How do I fix dropped stitches in my crochet granny square?
It's an easy fix! Simply locate the dropped stitch, pull the yarn back to the last completed row, and carefully redo the stitches in that area. Use a stitch marker to indicate where you left off for easier counting as you continue.
Can I use different colors within my crochet granny square?
Absolutely! Mixing colors is encouraged! You can alternate colors from square to square or even change colors within a round. Just remember to join new colors in a relaxed manner, so transitions remain smooth and vibrant.

Leave a Reply