
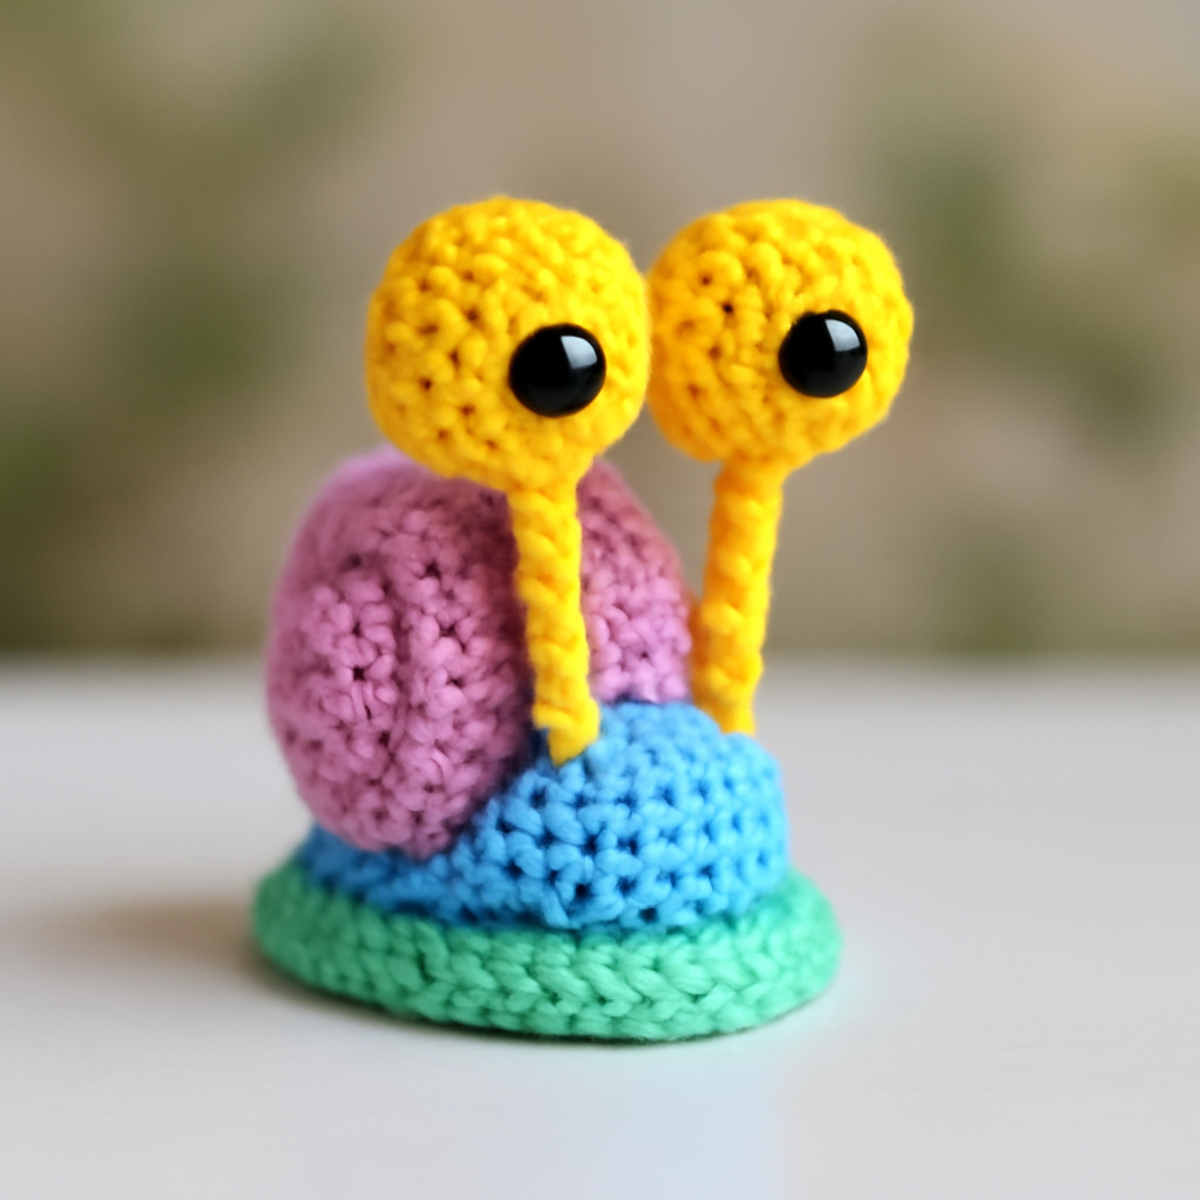
As I sift through my colorful yarn stash, a vibrant pink catches my eye, whispering promises of charm and whimsy—just perfect for our next cozy project: the crochet snail amigurumi! This delightful Amigurumi Snail Delight isn't just a pattern; it invites you into a lively world of creativity that brightens rooms and warms hearts. With its cheerful design and playful color palette, this enchanting little snail stands just 4-5 inches tall, making it an ideal gift or eye-catching decoration. Not only is it a fantastic stash-buster, but the straightforward construction offers a joyful experience for crocheters at any skill level. Ready to spin your yarn into this playful companion and brighten your crafting days? Let’s dive in and bring this adorable snail to life together!
Crochet Snail Amigurumi Materials & Tools
To embark on your delightful crochet snail amigurumi journey, gather the following materials:
Yarn
- Worsted Weight Yarn – A fun mix of colors including pink, blue, yellow, and green; you'll need approximately 60-80 yards combined.
Tools & Notions
- 3.5mm (E) Hook – Perfect for achieving the ideal tension; adjust to your preference as needed.
- Yarn Needle – Essential for weaving in ends for a neat finish.
- Black Safety Eyes – Add character and detail to your whimsical snail.
- Stuffing Material – Use fiberfill or another stuffing to give your snail shape and softness.
- Stitch Markers – Handy for keeping track of rounds, especially during color changes.
Why Crochet a Snail Amigurumi?
Adorable Design: This crochet snail amigurumi features a charming aesthetic that captures the whimsy of childhood, making it a delightful piece for any collection.
Beginner-Friendly: Utilize basic stitches and straightforward techniques to create a fun project that’s perfect for newbies!
Colorful Palette: Bring your imagination to life with bright and cheerful hues; customize it with leftover yarn and make each snail unique.
Quick to Make: At just 4-5 inches tall, this snail is a quick project that’s easy to gift or display, bringing a splash of color to any space.
Endless Customization: Play with size, colors, or embellishments to make your snail truly one-of-a-kind—a wonderful way to express your creativity!
Gauge & Sizing Notes
Don't skip the gauge swatch! Checking your tension for the crochet snail amigurumi is crucial to ensure your finished snail achieves that charming 4-5 inch height. A recommended standard gauge is a 4×4 inch (10×10 cm) square of single crochets—however, always remember that personal tension can vary. If you find your swatch is smaller than expected, simply try using a larger hook size to loosen your stitches. To make your lovely snail even bigger, you can adjust your starting chain in multiples of 6 + 2. This way, you can achieve the whimsical size you desire while making your crochet snail amigurumi truly unique!
Step-by-Step Pattern for crochet snail amigurumi
Row 1: Start the Body
Begin by creating a magic circle, then ch 1. Work 6 sc into the circle, pulling the tail to close it tightly (6 sts). As you crochet, your work will form a small oval shape.
Row 2: Increase the Body
Continue with the second row by working 2 sc in each stitch around (12 sts). You should see the base expanding, forming a more rounded shape, which will be the snail's body.
Row 3: More Increases
For this round, crochet (sc in the next stitch, inc in the next stitch) around for a total of 18 stitches (18 sts). At this stage, the base should begin to look more like the snail's main body.
Row 4: Shape the Shell
Next, transition to the shell by working hdc in each stitch around (18 sts). As you create these half double crochets, your work should start to rise, forming the shell's depth and shaping the top of the snail.
Row 5: Continue Shell Design
For this row, switch to dc for added height, making sure to continue to stitch in each of the 18 sts (18 sts). Observe how the stitches create a nice, spiraled look reminiscent of a snail's shell.
Row 6: Final Shell Round
Finish off your embellishing by working (dc in the next 2 stitches, inc in the next) around for a total of 24 stitches (24 sts). Your crochet snail amigurumi shell should be beautifully rounded and vibrant now!
Step 7: Add Safety Eyes
Before closing the body, use your yarn needle to attach black safety eyes on a yellow top, stitching them securely into place to bring your snail to life. Position them carefully for a playful expression.
Step 8: Create Antennae
For the antennae, ch 6, then sl st back to the base of the body. Repeat on the other side. Secure the ends tightly so they stand up, enhancing your snail’s whimsical charm.
Step 9: Base for Stability
Finish the base by working a round of sc through the existing stitches, securing the bottom of your crochet snail amigurumi (24 sts). Your project should feel solid, ready to stand beautifully on display.
Step 10: Weave in Ends
Using your yarn needle, weave in any remaining tails from your crochet snail amigurumi. This final touch ensures a neat and polished look, completing your adorable snail!
Expert Tips for Crochet Snail Amigurumi
-
Keep Even Tension: Maintaining consistent tension is crucial for a polished appearance. Uneven stitches can lead to an unbalanced shape, so take your time!
-
Mark Your Rounds: Use stitch markers to keep track of the beginning of each round, especially during color changes. This helps avoid losing count and keeps your work organized.
-
Check for Gaps: While constructing the shell, check for any gaps between stitches. If you notice any, simply work an extra stitch into those spaces to fill them in.
-
Secure Safety Eyes: When positioning the safety eyes, ensure they are stitched securely. A playful expression can make your crochet snail amigurumi come to life!
-
Weave in All Ends: Don’t skip weaving in the yarn ends at the end! This final step not only tidies your work but also adds durability to your creation.
What to Pair with Amigurumi Snail Delight?
As you stitch the charming crochet snail amigurumi, let your creativity roam free and explore delightful pairings that enhance your whimsical collection.
-
Colorful Mini Cactus: A vibrant, spiky friend for the snail, crafted using bright yarn to complement its playful hues.
Stitching a mini cactus with soft blooms not only continues the colorful theme but adds a delightful contrast that draws the eye. -
Charming Crochet Flowers: Adorn your snail's world with whimsical flowers, bringing a burst of joy to its surroundings.
These lovely blooms can be made in various colors, echoing the playful palette of your snail, and are perfect for embellishing any project. -
Happy Little Ladybug: A tiny amigurumi ladybug will create a sweet insect scene alongside your snail, enhancing the charm.
With similar construction techniques, these critters can give your crochet collection a delightful garden vibe. -
Cute Crochet Mushroom: Add a fairy-tale touch by creating a vibrant mushroom that harmonizes with the color palette of your snail.
This project offers a wonderful opportunity to practice your skills while crafting an enchanting ambiance. -
Playful Yarn Garland: String together your finished projects to create an eye-catching display that showcases your crochet snail amigurumi and its friends.
This colorful addition ties everything together beautifully, celebrating your artistic journey and the joy of crafting.
Crochet Snail Amigurumi Variations
Embrace your creativity and let your crochet snail amigurumi reflect your unique style with these fun customizations!
-
Pastel Colors: Soften the overall look by choosing a gentle pastel palette; these tones will give your snail a dreamy charm.
-
Variegated Yarn: Use variegated yarn to add an intricate twist, allowing shades to blend and create a mesmerizing shell pattern. Watch how the colors swirl!
-
Larger Version: Want a bigger buddy? Use a larger hook or double up on yarn to create an oversized version that stands out in any display.
-
Embellished Antennae: Add small flower appliqués or pom-poms to the antennae for an extra touch of whimsy. These tiny details can drastically change your snail's character!
-
Fringe Trim: Incorporate fringe around the snail's base for a fun and textured finish. This playful addition enhances its tactile appeal.
-
Button Eyes: Swap out safety eyes for oversized buttons for a quirky, vintage look that adds personality to your amigurumi friend.
-
Striped Shell: Change up the shell design with stripes by alternating yarn colors every few rows. This fun technique gives the snail a unique flair.
-
Crochet Border: Finish off the base with a decorative border using shells or picot stitches. This added detail provides a lovely accent that draws the eye.
How to Wash and Care for Your Crochet Snail Amigurumi
Hand Washing: Gently hand wash your crochet snail amigurumi in cold water with mild detergent to preserve its vibrant colors and shape. Avoid twisting or wringing to protect the stitches.
Drying: Lay the snail flat on a clean towel to air dry, reshaping any areas as needed while it dries. Avoid hanging to prevent stretching or misshaping your adorable creation.
Storage: When not on display, store your snail in a cool, dry place away from direct sunlight to maintain its bold colors and whimsical charm. Keep it in a breathable bag if needed.
Blocking: If the shape appears uneven after washing, use a light steam blocking method to gently mold it back into shape, ensuring it retains its delightful form.
Amigurumi Snail Delight FAQs
Can I use a different yarn than worsted weight?
Absolutely! While worsted weight yarn is recommended for the crochet snail amigurumi, you can use other yarn weights. Just keep in mind that adjusting the hook size will help maintain the structure and size. If you opt for a lighter yarn, your snail may end up smaller and more delicate.
How can I make my snail larger or smaller?
To customize the size of your crochet snail amigurumi, consider using a larger hook or adding more yarn strands together. If you want a smaller snail, use a finer yarn and a smaller hook to achieve the desired effect. Just be sure to adjust your stitch count accordingly for any changes!
Why is my crochet work curling at the edges?
Don't panic! Curling edges usually occur due to tight stitches or too few increases. Keep an eye on your tension and ensure you're following the pattern's increase instructions. If you notice it during the shell portion, try loosening your stitches or adding an extra round of increases for a better shape.
How do I fix a dropped stitch in my crochet project?
It's an easy fix! Just use a yarn needle to carefully pull the dropped stitch back up through the previous stitches. If it's a significant drop, you may need to crochet a few stitches below to connect the yarn back into the correct row. Always check your work regularly to catch any hiccups early!
What hook size should I use if I'm a beginner?
The 3.5 mm (E) hook is the perfect size for this project, but if you're a beginner, the key is to choose a hook that feels comfortable in your hand. If you're struggling with tension, you might try a different hook size to find the one that creates stitches you’re happy with!
Can I add embellishments to the snail, and how?
Absolutely! Customizing your crochet snail amigurumi with small flower appliqués or buttons can elevate its charm even more. Simply stitch them on securely after your snail is complete, or incorporate them while crocheting to create a unique and playful look that showcases your creativity!

Leave a Reply