
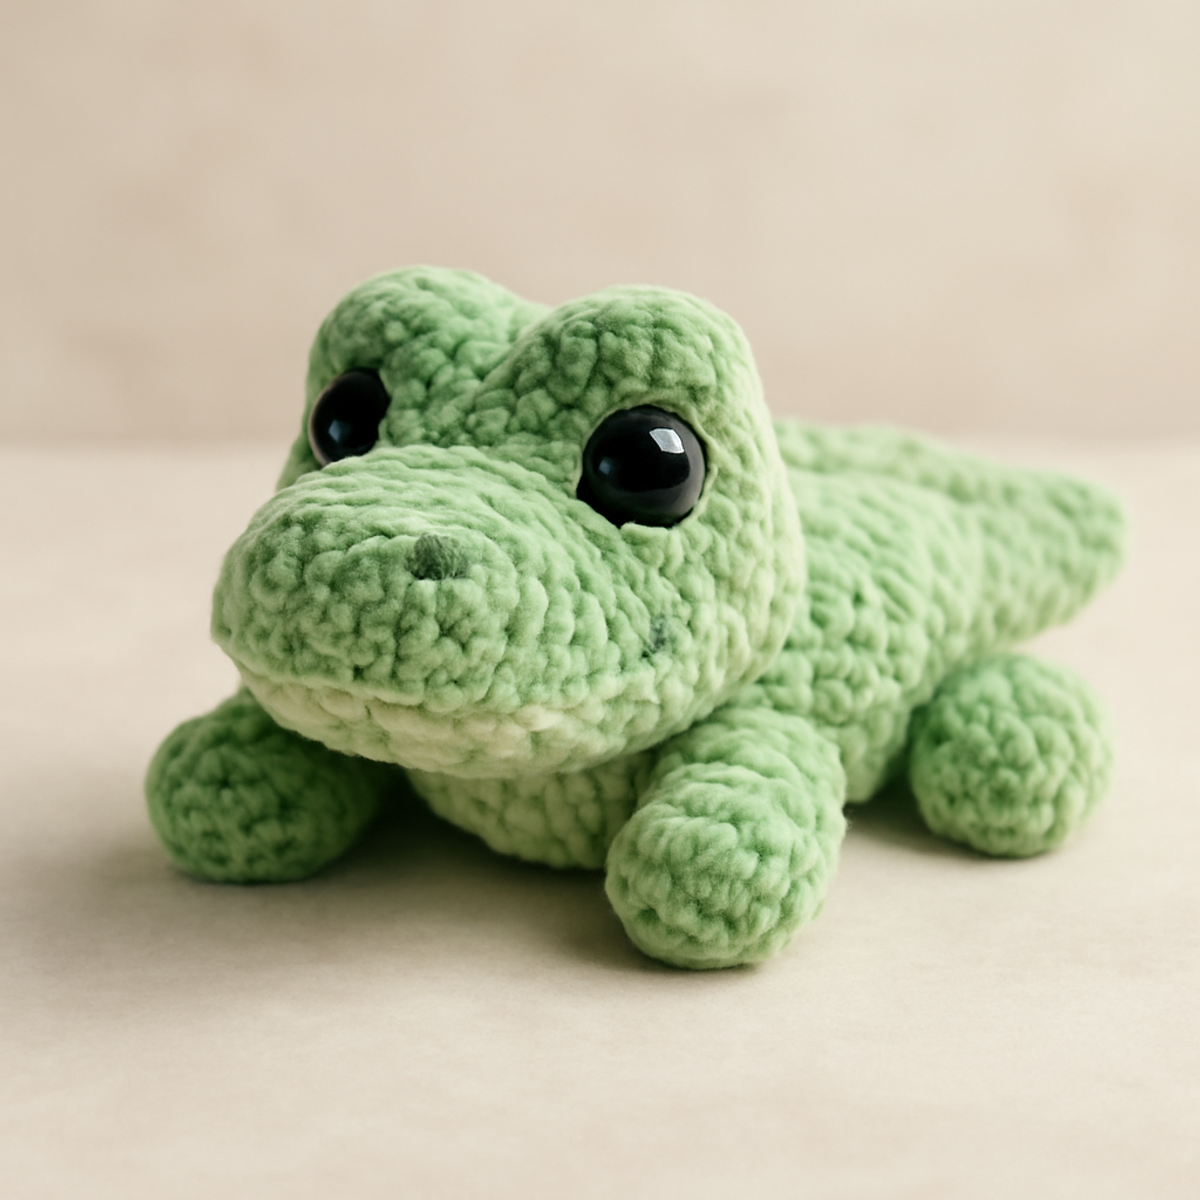
When I spotted that little green gator nestled among my yarn stash, I felt an undeniable urge to bring it to life. This crochet gator isn't just a stuffed toy; it's an opportunity to create a delightful companion that promises to be cherished by both kids and adults alike. The “Adorable Plush Green Gator” pattern is beginner-friendly and incorporates plush chenille yarn for a soft, huggable texture perfect for cuddling. As you work through its charming design, you can let your creativity soar, customizing colors and features to add a personal touch. With clear instructions guiding you through each step, this project makes for a cozy afternoon of stitching. Ready to dive into making your very own crochet gator? Let’s grab those hooks and get started!
Cozy Crochet Gator Materials & Tools
- Chenille Yarn – Use light green and pale green shades for a plush texture; estimated total yardage is around 200-300 yards.
- 4.0 mm (G) Hook – This size ensures a tight stitch to keep the stuffing from showing through.
- 8 mm Safety Eyes – Essential for bringing your crochet gator's face to life and giving it an adorable stare.
- Polyester Stuffing – Provides the fluffiness and huggable quality that makes your crochet gator perfect for cuddles.
- Yarn Needle – Ideal for weaving in ends and assembling the pieces securely.
- Scissors – For trimming yarn as you work to keep your project neat and tidy.
Why Create Your Own Crochet Gator?
Endearing Charm: This crochet gator brings a whimsical flair to any space, making it not only a playful toy but also a delightful decor piece.
Beginner-Friendly: Perfect for novice crafters, this pattern easily guides you through basic techniques, ensuring a fun and stress-free experience.
Soft & Cuddly: Crafted from plush chenille yarn, the gator has an inviting squishiness that makes it an ideal companion for both kids and adults.
Customizable Features: Explore your artistic side by altering colors and personalizing facial expressions, letting your crochet gator truly reflect your unique style.
Quick to Make: With straightforward construction, you can enjoy a cozy stitch session and have your gator ready to cuddle in no time!
Gauge & Sizing Notes
Don't skip the gauge swatch! Checking your tension is essential when crafting your crochet gator to ensure it turns out perfectly cuddly. A general guideline is to aim for a 4×4 inch (10×10 cm) square to contain about 14 single crochets by 8 rows; this ensures your gator maintains its expected shape and size. If you want to make your gator larger, simply increase your starting chain or rounds in multiples of 6 to adjust the width and height accordingly. If your swatch feels too small, don’t worry—just try going up a hook size for that soft, plush effect that makes your crochet gator truly irresistible!
Step-by-Step Pattern for crochet gator
Row 1: Start the Head
Begin with a magic ring (MR); ch 1, then work 6 sc into the ring (6 sts). Pull the tail of the yarn to tighten the MR, ensuring it forms a snug circle. Your work should lay flat and appear round, setting the foundation for the gator's adorable head.
Row 2: Increase for the Head
In the next row, make 2 sc in each stitch around (12 sts). This will help in forming the gator's rounded head shape. Keep your work consistent to maintain an even texture, which is essential for the plush effect you desire.
Row 3: Continue Increasing
For this row, sc in the first stitch, inc in the next; repeat around (18 sts). Your stitches should begin to curve upwards, creating the gator's charming visage. Make sure to count your stitches to avoid any miscounts that might disrupt the shape.
Row 4: Shape the Head
Next, sc in the first 2 stitches, inc in the next stitch; repeat around (24 sts). The head will start looking fuller, so take a moment to admire your progress. Your work should continue to cup as you progress through these rounds.
Row 5: Establish the Body
Transition to creating the body by crocheting sc in each stitch around for 4 rounds (24 sts each round). Your gator's body should start to grow, becoming more defined. The plush texture should feel cozy between your fingers, adding to the excitement of your project.
Row 6: Increase for the Body
Now, for the body, sc in the first 3 stitches, inc in the next stitch; repeat around (30 sts). You will notice the curves taking shape. Ensure your tension remains consistent for an even finish that enhances the softness of your crochet gator.
Row 7: Continue Body Rounds
Maintain the body shape with sc in each stitch around for 3 more rounds (30 sts each). The gator will appear to plumpen, giving a lovely rounded look. Your stitches should feel harmonious, making it satisfying to see the gator form beautifully.
Row 8: Shape the Body
Now, it's time to sc in the first 4 stitches, inc in the next stitch; repeat around (36 sts). The body may feel a bit fuller now, creating a wonderful plush structure that is perfect for cuddling, enhancing the overall cuteness of your crochet gator.
Row 9: Prepare to Attach Limbs
For the next round, sc in each stitch around (36 sts). This round stabilizes the body and prepares you for working on the arms and legs. The plush shape should be evident, so take this moment to enjoy how cute your gator is becoming.
Row 10: Arms and Legs
Create the limbs separately by using a MR; ch 1, work 6 sc into the ring (6 sts). Your arms or legs will start from this round; keep the tension tight to prevent stuffing from showing through later. Set it aside after this round, and repeat for the remaining limbs.
Row 11: Increasing Limbs
For each limb, increase in the next round with 2 sc in each stitch around (12 sts). The limbs will begin to take form, making them appear charming and stubby, which suits the whimsical nature of the crochet gator perfectly.
Row 12: Finalize Limbs
Continue shaping the limbs with sc in each stitch around for 3 rounds (12 sts each). Each limb should feel soft and flexible at this stage; set them aside for the assembly. Ensure you have the right number of limbs before moving on to the tail.
Row 13: Start the Tail
Begin the tail using a MR; ch 1, then work 4 sc into the ring (4 sts). The tail will provide a cute finishing touch to your gator, ensuring it has that playful look. Make sure the magic ring is tight to maintain a rounded tail shape.
Row 14: Shape the Tail
For the next round, work 2 sc in each stitch around (8 sts). The tail should start bulkily, which will add to the gator’s personality. Adjust your grip to maintain a comfortable flow as you work through this last section of the tail.
Row 15: Lengthen the Tail
Continue with sc in each stitch around for 3 rounds (8 sts each). This will give the tail character and allow you to attach it securely to the body later. You should now see the tail looking sturdy but adorable, perfect for your finished crochet gator.
Step 16: Assembly
To assemble your crochet gator, securely stitch the head to the body, using your yarn needle and the same yarn. Position the arms and legs evenly on the body, stuffing lightly for dimension. Finally, attach the tail at the back, ensuring all parts feel secure for a durable plush toy.
Step 17: Add Face Details
Using safety eyes, attach them securely to the gator's head. Embroider a friendly smile or playful expression to bring your crochet gator's personality to life. These little details will transform your soft toy into a joyful companion, just waiting to be loved.
Expert Tips for Your Crochet Gator
-
Consistent Tension: Maintain even tension throughout your project to achieve a uniform plush texture for your crochet gator; this ensures the stuffing won't peek through.
-
Count Stitches Regularly: Keep track of your stitch count after every row to avoid miscounts that can alter the shape of your adorable gator unexpectedly.
-
Tidy Finishing: Block your pieces before assembly to create a polished finish. This will enhance the overall appearance and shape of your gator, ensuring it looks its best.
-
Firm Assembly: Take your time when stitching parts together, reinforcing seams for durability. A secure assembly will make your crochet gator a lasting cuddly companion.
-
Be Creative: Experiment with yarn colors and facial expressions to give your crochet gator a unique personality, allowing each creation to shine with your individual style.
How to Wash and Care for Your Crochet Gator
Machine Washing: Use cold water on a gentle cycle to preserve the plush texture of your crochet gator. Avoid agitation to prevent any felting or pilling of the chenille yarn.
Hand Washing: For extra care, hand wash your gator using a mild soap. Gently swish it in cold water and avoid wringing to maintain the soft fibers.
Drying/Blocking: Lay your crochet gator flat on a clean towel to dry. This helps it retain its shape and fluffy appearance without any stretching.
Storage: When storing your crochet gator, keep it in a cool, dry place away from direct sunlight to prevent fading. Ensuring it's free from dust will keep it looking adorable for years!
What to Pair with Adorable Plush Green Gator?
Creating your cozy crochet gator is just the beginning of your whimsical crafting adventure!
-
Snuggly Crochet Blanket: A fluffy blanket in coordinating green hues will enhance your gator's charm as a delightful playtime companion. The soft texture invites cuddles and warmth during chilly nights.
-
Charming Gator Keychain: Transform leftover yarn into a mini gator keychain! This adorable accessory keeps a piece of your crafting joy close at hand. It's a fun way to show off your handiwork.
-
Cute Plush Turtle: Complement your crochet gator with a friendly turtle, featuring similar colors and a squishy body. This duo would make a perfect friendship gift for little ones!
-
Gator-themed Baby Mobile: Hang a mobile featuring your crochet gator alongside other aquatic friends. This whimsical decor will enliven any nursery or play area while promoting imaginative play.
-
Matching Softie Set: Think about crafting a variety of plush animals with varying colors and styles to create a charming collection. This could also inspire exciting stories for imaginative playtime adventures!
crochet gator: Fun Variations Ahead!
Embrace your creative spirit and explore these delightful options to make your crochet gator uniquely yours!
-
Color Choices: Experiment with vibrant hues like turquoise or soft pastels for a whimsical twist on your gator.
-
Darker Greens: Swap in darker green yarn for the body to give your gator a rich, lively appearance. The contrast can bring a new charm.
-
Cotton Alternative: Try cotton yarn for a more textured finish, giving your gator a unique feel while maintaining the same playful design.
-
Larger Gator: Use a thicker yarn and a larger hook to create a bigger, huggable version, perfect for cuddles or as a statement decor piece.
-
Adorable Baby Gator: Switch to a lighter weight yarn and adjust your hook size to fashion a tiny baby gator, an ideal gift for little ones!
-
Pompom Tail: Add a fluffy pompom at the end of the tail for a fun and playful touch, making your gator stand out even more.
-
Fringe Details: Embellish the arms and legs with a little fringe using contrasting yarn to give your gator a playful and textured look.
-
Facial Expressions: Get creative with various stitched mouth and cheek details, allowing each gator to showcase its one-of-a-kind personality!
Let your imagination flow and enjoy bringing your crochet gator to life!
Adorable Plush Green Gator FAQs
Can I substitute yarn for my crochet gator project?
Absolutely! While the pattern calls for light green and pale green chenille yarn, you can use other yarns like acrylic or cotton. Just be mindful of the yarn weight—choose a similar thickness to ensure your gator keeps its cute shape!
How can I make my crochet gator bigger or smaller?
To adjust the size, simply change the yarn weight and hook size. Using a bulkier yarn and a larger hook will create a bigger gator, while a finer yarn with a smaller hook will yield a petite version. Just remember to adjust your stitch counts accordingly!
What should I do if my work is curling?
Don't panic! Curling can happen, especially in the initial rounds. Make sure you're keeping your tension consistent. If the curling continues, try blocking the pieces before assembly; this helps flatten curves and gives your gator a polished look.
How do I fix dropped stitches in my crochet gator?
It's an easy fix! Simply use a yarn needle to weave the dropped stitch back into place. Alternatively, you can unravel a few stitches back to the dropped stitch and re-crochet them. Just take your time, and your gator will be back on track!
What hook size should I use for this crochet gator?
A 4.0 mm crochet hook is recommended for this project. This size ensures tight stitches that keep the stuffing from showing through, allowing for that cuddly plush effect you're aiming for with your adorable gator.

Leave a Reply