
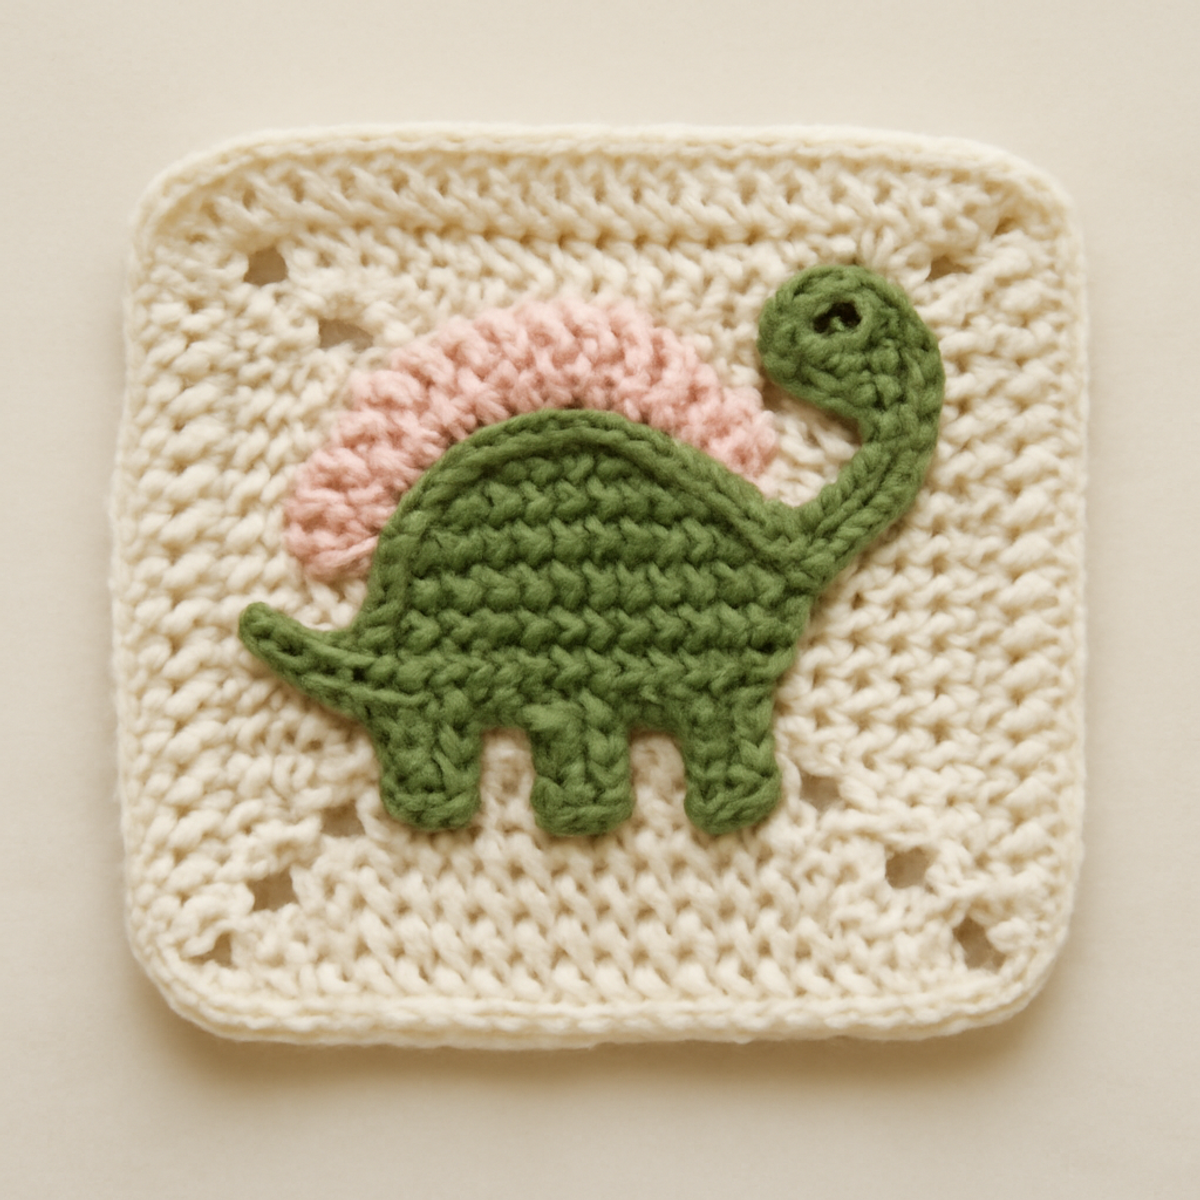
There’s something utterly charming about transforming yarn into a delightful creature that can spark joy and imagination—like our adorable Cute Dino Granny Square! This project is perfect for beginners looking to dive into crochet with a fun and visually engaging design. Not only does this whimsical granny square bring a pop of character and color to your creations, but it also introduces you to essential crochet techniques in the most enjoyable way. With its straightforward construction, you’ll find this pattern to be a fantastic opportunity to build your skills, while its versatile design makes it a wonderful addition to children's blankets, cushions, or playful décor. Are you ready to unleash your creativity and add some dino magic to your crochet collection? Let's get started!
Cute Dino Granny Square Materials & Tools
-
Yarn
- Size 3 (DK) or 4 (Worsted) Yarn – A lightweight yarn in cheerful colors like green, beige, and pink works best to create your cute dino granny square.
-
Hook
- 4.0mm (G/6) or 5.0mm (H/8) Hook – Choose a hook size that matches your yarn for a snug yet flexible finish.
-
Notions
- Stitch Markers – These are essential for keeping track of your rounds, especially as you navigate the fun intricacies of this design.
- Yarn Needle – Perfect for weaving in those pesky ends and ensuring a neat appearance in your finished piece.
- Safety Eyes (optional) – Add extra charm by embellishing your dino with safety eyes for a playful touch!
Enjoy this journey of crochet and watch as your cute dino granny square comes to life!
Why Choose the Cute Dino Granny Square?
Endearing Design: The playful dinosaur motif is sure to bring smiles, making it a delightful addition to any child’s space.
Easy Construction: Following simple crochet techniques, this project is perfect for beginners eager to practice their skills in a fun way.
Versatile Use: Whether it’s part of a cozy blanket or a whimsical cushion cover, this granny square adapts to various creative projects effortlessly.
Colorful Creativity: With vibrant hues and the option to customize colors, you can easily express your personal style while bringing this adorable dino to life!
Gauge & Sizing Notes
Don't skip the gauge swatch! Ensuring the correct tension is vital for your Cute Dino Granny Square to come out just right; it can make the difference between a perfectly sized square and one that's too big or too small. Aim for a standard gauge of approximately 4×4 inches (10×10 cm), equating to 16 double crochets by 10 rows, though individual tension may vary. To adjust the size, increase your starting chain in multiples of 3 for a broader square, or decrease in the same multiples for a smaller square. If your swatch is too tight, simply go up a hook size to achieve that delightful cozy drape. Happy crocheting!
Step-by-Step Pattern for Cute Dino Granny Square
Row 1: Foundation Chain
Start by making a slip knot and chain (ch) 4. Join the last chain to the first with a slip stitch (sl st) to form a small ring. Chain (ch) 3 to begin your first round, which counts as your first double crochet (dc). Your work should start forming the center of the granny square.
Round 2: Increase Round
In the center ring, work 2 dc in the ring, followed by a chain (ch) 2. Repeat this sequence (2 dc, ch 2) three more times for a total of four corner spaces. Join the round with a sl st to the top of the initial ch-3. Your round should now have 8 dc and 4 ch-2 spaces (8 sts).
Round 3: Expanding the Square
Slip stitch into the first ch-2 space, then chain (ch) 3. In the same space, work 2 dc, ch 2, and 3 dc to create your first corner. In each of the next ch-2 spaces, work (3 dc) to form the sides. Repeat the corner sequence in each ch-2 space. Join the round with a sl st. Your work should start to flatten out into a square shape (24 sts).
Round 4: Dino Body Color Change
Begin this round with a slip stitch into a corner space. Change to green yarn for the dino's body. Chain (ch) 3, then in the same corner space, work 2 dc, ch 2, and 3 dc. For each side between the corners, work (3 dc) in the next ch-2 spaces. Join with a sl st at the end of the round. You should have a bright green square with 24 dc (24 sts).
Round 5: Forming Dino Spikes
Continue working in the same green color. In each corner space, work (3 dc, ch 2, 3 dc) as before. For every side, alternate between (1 hdc and 1 dc) in each stitch. This will form the spikes along the edges. Join with a sl st and your cute dino granny square will now show off its playful features (36 sts).
Step 6: Assembly of Features
Switch to your desired color (pink) for the dino’s spikes and facial features. Using sl sts, attach safety eyes or embroider them if you prefer. For extra dimension, stitch around the edges of the squares. Your finished project should reflect a charming dinosaur character ready for play or decorative purposes!
What to Pair with Cute Dino Granny Square?
Let your creativity flourish by complementing your charming creation with delightful accessories that enhance its playful spirit.
- Dino-Themed Pillow: Create a cozy pillow using the same colors to continue the whimsical design on your couch or child's bed. It’s a perfect way to showcase your new skill!
- Matching Beanie: Crochet a cheerful beanie in coordinating colors for a cozy hat that brings the adventurous dino to life for little ones. A matching set is always a win!
- Granny Square Blanket: Join multiple cute dino granny squares to craft a vibrant blanket that will keep little ones warm while stimulating their imaginations. The possibilities are endless!
- Decorative Wall Hanging: Turn several granny squares into a playful wall hanging, making the dino motif a centerpiece in a child’s room. It's a charming way to add character to any space!
- Mini Dino Plushie: Add a small crocheted dino plushie made with the same yarn to create a delightful companion for your little one. It’s a perfect gift that doubles as a toy!
Cute Dino Granny Square Variations
There’s nothing quite as rewarding as making a crochet project your own! Let your imagination roam free as you explore these delightful variations.
-
Yarn Weight Swap: Try using a size 5 (bulky) yarn for a cozier, thicker granny square that’s perfect for cuddles.
-
Color Blocking: Combine your favorite colors! Alternate sections between green, blue, or even pastel shades for a vibrant, playful look.
-
Fiber Alternatives: Consider mixing 100% cotton and acrylic yarns for a mix of softness and durability. This gives a unique texture to your square.
-
Larger Dimensions: Go big by increasing your hook size to 6mm (J/10) and selecting a heftier yarn—great for giant plushies or bulkier blankets.
-
Textured Edge: Add fun pom-poms or fringes around the border! Just a few quick techniques can turn a standard square into a statement piece.
-
Embellished Details: Use embroidery to add fun details! Consider adding a whimsical tail or playful spots that reflect your own creative touches.
-
Mini Dino Variation: Create smaller versions of the cute dino granny square to make adorable coasters or keychains, perfect for gifts! Just scale down your yarn and hooks accordingly.
-
Shape Alteration: Experiment by transforming the granny square into a triangle or hexagon! This twist can give your patterns a fresh aesthetic.
Care Instructions for Cute Dino Granny Square
-
Machine Washing: When your cute dino granny square needs a wash, use cold water on a gentle cycle, ensuring to place it in a mesh laundry bag to protect its shape.
-
Hand Washing: For extra care, hand wash your square in lukewarm water with mild detergent. Gently swish it without agitation to avoid felting or pilling.
-
Drying/Blocking: Lay your finished square flat on a clean, dry towel to maintain its shape while drying. This prevents any distortion and keeps your dino looking delightful.
-
Storage: Store your cute dino granny square in a cool, dry place away from direct sunlight to preserve color and prevent any damage from dust or moisture.
Expert Tips for the Cute Dino Granny Square
-
Check Your Tension: Consistent tension is key to keeping your square uniform. Practice until you’re comfortable with your stitch tightness for the perfect cute dino granny square.
-
Use Stitch Markers: Place stitch markers at the beginning of each round to help track your progress and prevent losing count during those exciting, intricate designs.
-
Count Carefully: Regularly check your stitch counts, especially after each round. Losing track can lead to uneven edges or distortion in your dino square.
-
Block for Perfection: After finishing, blocking your square helps to smooth out any irregularities in the shape, resulting in a polished final look that enhances your cute dino granny square.
-
Secure Loose Ends: Weaving in all loose ends is essential for a neat and tidy finish. This will keep your adorable square looking its best and be ready for snuggles!
Cute Dino Granny Square FAQs
Can I substitute the yarn for my cute dino granny square?
Absolutely! If you don't have the exact yarn type mentioned, you can opt for either a 100% acrylic or a cotton blend. Just make sure to match the weight to a size 3 (DK) or size 4 (worsted) yarn. This ensures your stitches and overall structure remain consistent!
How do I adjust the size of my granny square?
Don't panic! To make your cute dino granny square larger or smaller, you can change your hook size or yarn weight. For a bigger square, use a larger hook and maybe a thicker yarn. Conversely, for a smaller version, try using a smaller hook along with the same weight yarn!
Why is my crochet granny square curling at the edges?
Curling is a common issue, especially for beginners. I recommend checking your tension first! If your stitches are too tight, the edges may curl. Another helpful tip is to ensure you're following the pattern's stitch count accurately—any missing or extra stitches can lead to curling.
What size hook should I use for the cute dino granny square?
For this project, using a 4mm (G/6) or 5mm (H/8) hook works best. I'd suggest starting with a 4mm hook to achieve a tighter stitch, which helps maintain the granny square's shape. Adjust if needed as you work through the pattern!
How do I fix dropped stitches in my granny square?
It's an easy fix! Just take a moment to locate the dropped stitch and use your yarn needle to pick it up. If it’s still in the row, gently tug the working yarn to pull it up to the correct level. Take your time to ensure it doesn’t disrupt the surrounding stitches!
Can I add extra details or embellishments to the cute dino granny square?
Absolutely! Personalizing your dino granny square adds that extra ‘wow’ factor! Embroidering details or adding a border around the square can enhance its charm. Feel free to let your imagination run wild—after all, crafting should always be about expressing your creativity!

Leave a Reply