
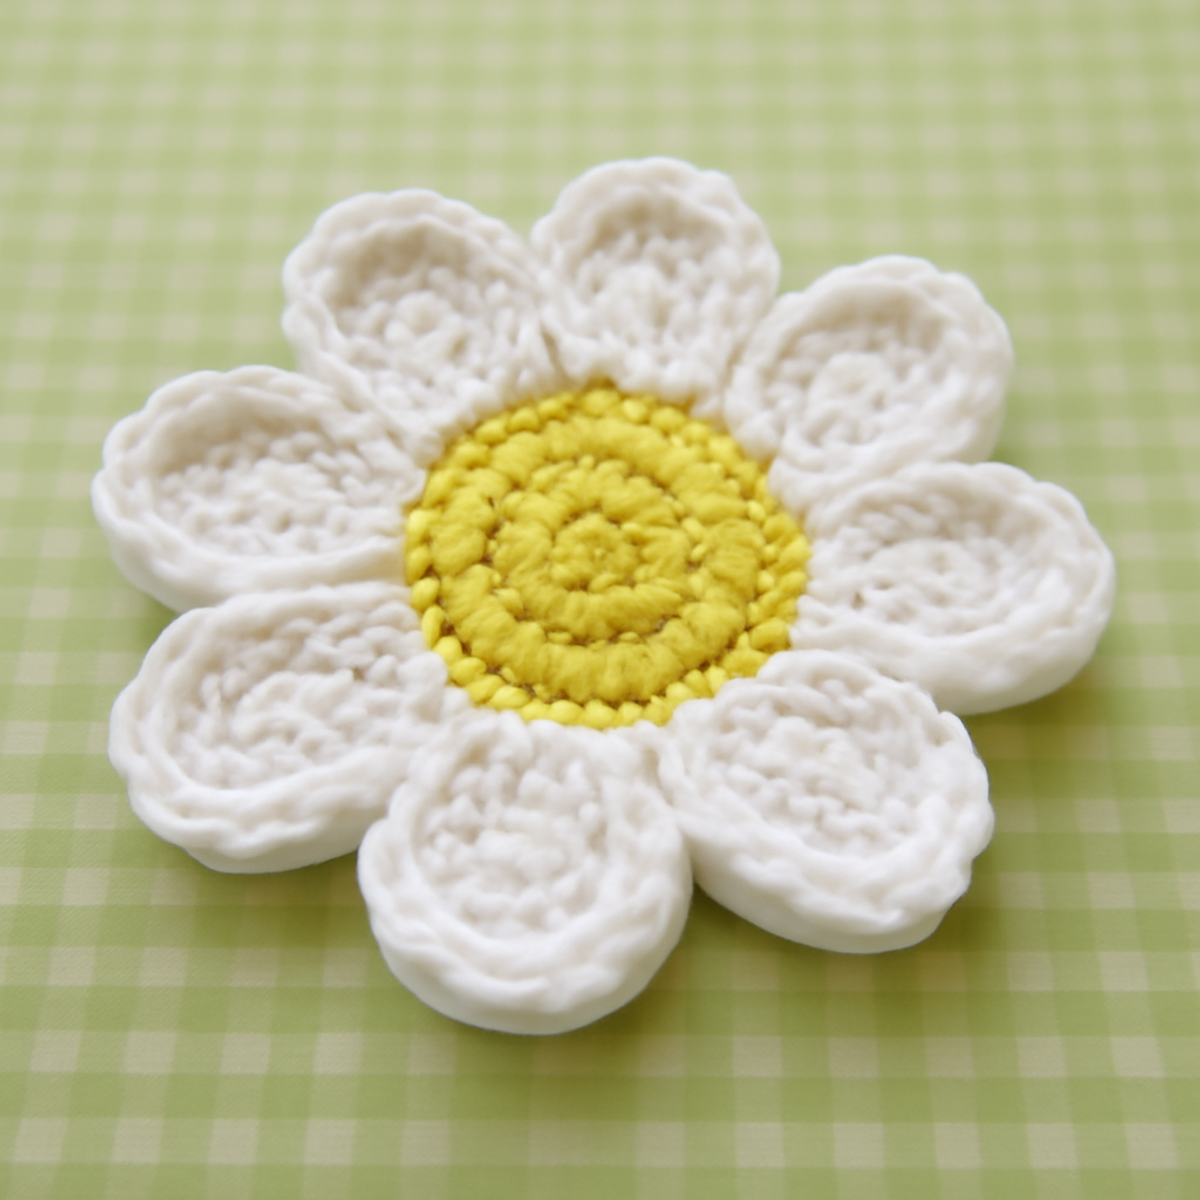
As I sat on my porch sipping tea, I couldn't help but smile at the cheerful little daisies popping up in my garden, their bright yellow centers a delightful burst of joy. Inspired by their playful charm, I set out to create these cozy daisy coasters, perfect for adding a whimsical touch to any table setting. This crochet pattern not only enhances your home decor but also safeguards your surfaces from drink stains, making it a practical yet adorable project. Suitable for both beginners and intermediate crafters, these daisy coasters are an enjoyable way to express your creativity while making thoughtful gifts for loved ones. Are you ready to bring a touch of floral delight to your crafting journey? Let’s get those hooks moving!
Daisy Coasters Materials & Tools
Yarn
- Light Worsted Weight Yarn (White) – You'll need approximately 100 yards to create a set of cheerful daisy coasters.
- Light Worsted Weight Yarn (Yellow) – About 25 yards will be perfect for the sunny center of your flowers.
Tools & Notions
- 5.0mm (H-8) Crochet Hook – This size helps achieve a soft yet structured finish for your coasters.
- Yarn Needle – Use this for weaving in ends and finishing off your projects neatly.
- Stitch Marker – Keep track of your rounds effortlessly with this handy tool.
Why are these daisy coasters a must-make?
Cheerful Design: The daisy coasters feature a playful floral pattern that brightens up any space, bringing a smile to your face. Easy Creation: This pattern is beginner-friendly but also fun for seasoned crafters, ensuring that everyone can enjoy the process. Practical Use: Protect your surfaces from stains in style while adding a touch of artistry to your home. Customizable Colors: Play with different hues to match your decor, making each coaster uniquely yours. Perfect Gifts: These coasters are both charming and functional, making them a heartfelt gift for friends and family.
Gauge & Sizing Notes
Don't skip the gauge swatch! Checking your tension is crucial for ensuring that your daisy coasters turn out just as delightful as you envision. A standard gauge for this project can be around 4×4 inches (10×10 cm), but it's always wise to create a tension swatch to confirm yours matches. If you find your swatch is too small, you may want to go up a hook size or adjust your starting round. To scale your daisy coasters larger, increase the number of rounds or chains in multiples of 2 to maintain the cozy floral shape. Remember, a little adjustment can make a big difference in your final results!
Step-by-Step Pattern for Daisy Coasters
Round 1: Create the Center
Begin by making a magic circle with yellow yarn, then ch 2 (counts as first hdc). Work 11 hdc into the circle, pull the yarn tail to tighten, and join with a sl st to the top of the ch 2. Your work should form a small, round center (12 sts).
Round 2: Build the Petals
Switch to white yarn. Ch 3 and work 1 dc into the same stitch as the sl st to form the first petal. In each of the next 11 sts, work (1 dc, ch 1, 1 dc) to create petals. Join with a sl st to the top of the ch 3. You should see 12 distinct petals (12 petals).
Round 3: Petal Shaping
Now, for each petal, ch 3 and turn your work. In the first petal, work (2 dc, ch 2, 2 dc) into the ch 1 space to make it fuller. Repeat this for every petal around. Keep the stitches loose enough to prevent curling. Join with a sl st to the top of the first petal. Your daisies should feel cushy and vibrant (12 petals).
Round 4: Finalizing the Shape
For a neat edge, switch to yellow yarn. Sl st into the next ch 2 space of a petal. Ch 1, then sc in the same space. Ch 1, skip 1 dc, and sc in the next ch 2 space of the next petal. Continue around until all petals are accented neatly. Join with a sl st to the first sc, leaving a lovely crisp finish (12 sc, 12 ch-1).
Step 5: Weaving in Ends
Using your yarn needle, weave in any remaining ends from the color changes. Make sure to tuck these threads neatly to maintain a clean, professional look for your daisy coasters. This will also help reinforce the structure of your coasters, ensuring they hold their shape beautifully.
Step 6: Optional Blocking
If desired, lightly block your finished daisy coasters while dampening them slightly. Lay them flat, shaping the petals and the central round section to enhance their plush and cheerful appearance. Blocking will help set the stitches and boost their visual appeal, making your daisy coasters a delightful addition to your home decor.
Expert Tips for Daisy Coasters
-
Gauge Matters: Ensure you’re checking your tension before starting, as an inconsistent gauge can lead to size discrepancies among your daisy coasters.
-
Count Carefully: Keep track of your stitch count with a stitch marker to avoid losing count, especially when crocheting the petals.
-
Loose Color Changes: When switching yarn colors, carry the yarn loosely. This prevents any tightness that might distort the shape of your coasters.
-
Blocking Benefits: Consider lightly blocking your finished coasters to set the stitches. This enhances their visual appeal and ensures they lay beautifully flat.
-
Neat Ends: Don’t forget to weave in all loose ends! This not only gives your daisy coasters a polished finish but also helps maintain their structure over time.
What to Pair with Cheerful Daisy Coasters?
As the vibrant hues of your daisy coasters brighten your space, consider crafting these delightful companions to create a cohesive and charming atmosphere.
-
Floral Placemats:
Add an elegant touch to your dining experience with matching placemats that echo the daisy theme, perfect for any meal. -
Daisy Mug Rug:
A smaller version of the coasters, these mug rugs provide a warm welcome for your favorite beverage while enhancing charm. -
Cozy Table Runner:
Create a beautiful table runner adorned with daisies to create a harmonious focal point for gatherings and celebrations. -
Cheerful Wall Hanging:
Bring the outdoors inside by crafting a wall hanging featuring daisies, adding a pop of color and whimsy to your decor. -
Sunny Flower Bunting:
Make a festive garland of daisy bunting to drape across rooms for an extra touch of cheer, perfect for any occasion.
Embrace the spirit of creativity and crafting as you explore these delightful projects!
How to Wash and Care for Your Daisy Coasters
Machine Washing: Use cold water on a gentle cycle to safely clean your daisy coasters without damaging the delicate floral design.
Hand Washing: For a more careful approach, gently hand wash your coasters in cold water with mild soap, avoiding agitation to prevent felting or pilling.
Drying/Blocking: Lay the coasters flat on a clean, dry towel to reshape and allow to air dry completely, enhancing their delightful structure and texture.
Storage: Store your daisy coasters in a cool, dry place, away from direct sunlight to prevent fading, ensuring they stay vibrant for years to come.
Daisy Coasters: Fun Variations & Substitutions
Are you ready to sprinkle your personal flair onto these charming daisy coasters? Let your creativity blossom as you explore different possibilities!
-
Color Changes: Switch from yellow and white to pastel shades like lavender and mint for a soft, enchanting look. Imagine a cozy tea party with these delicate hues adding warmth!
-
Yarn Substitutions: Opt for cotton yarn instead of acrylic for increased absorbency and a more eco-friendly option. Cotton is perfect for those summer afternoons sipping lemonade!
-
Size Alterations: Increase the number of rounds for both the center and the petals to create larger coasters. This simple tweak can make them perfect for serving larger mugs.
-
Textured Borders: Add a touch of flair with a crab stitch border in contrasting colors. This adds charm while ensuring the coasters are both functional and eye-catching.
-
Fringe Accents: Attach small fringes along the edges for a bohemian vibe! This simple addition can turn your coasters into vibrant decor pieces that steal the show.
-
Seasonal Themes: Embrace the changing seasons by crafting coasters in seasonal colors—bold oranges and browns for autumn, or bright reds and greens for the holidays.
-
Personalized Touch: Incorporate embroidery or embellishments like buttons to customize each coaster further. Transform them into a lovely keepsake for your family gatherings.
-
Multi-Purpose Projects: Convert your daisy design into keychains or bag embellishments! Crafting smaller versions can add charm to your everyday items while still celebrating the daisy theme.
Cheerful Daisy Coasters: Crochet Pattern for Floral Decor FAQs
Can I use a different type of yarn for the daisy coasters?
Absolutely! Feel free to substitute with a cotton blend for better absorbency or opt for a heavier yarn if you want a sturdier coaster. Just keep in mind that the gauge may change, so adjusting your hook size or stitch count may be necessary.
What if my coasters are curling at the edges?
Don't panic! This is often due to tight stitches or an inconsistent tension. Make sure your stitches are loose enough, especially around the petals. If they still curl, try lightly blocking your finished coasters by dampening them and laying them flat to reshape the petals.
How can I make my daisy coasters larger or smaller?
It's pretty easy! To make your coasters larger, simply add more rounds to both the center and the petals. For a smaller size, reduce the number of stitches in the magic circle or decrease the rounds. Be sure to maintain consistent gauge for the best results.
What size hook should I use for my daisy coasters?
I recommend using a 5mm (H-8) crochet hook for your daisy coasters. This size strikes a lovely balance between creating a soft texture while still providing enough structure for the petals. If you’re experimenting with different yarn weights, you might need to adjust the hook size accordingly.
How do I fix dropped stitches in my work?
It’s an easy fix! If you notice a dropped stitch, simply use your yarn needle to carefully pull the yarn back up to the appropriate row. For a double crochet stitch, you can also use your hook to pick it back up and rework the stitch to maintain the flow of your coaster.
Why is my work not coming out the right size?
This usually comes down to gauge! Be sure to check your tension before starting. A quick tension check will help you identify if you need to adjust your hook size or stitch counts to match the pattern's intended dimensions.

Leave a Reply